With the 7.0 release in May 2024, "Kasten by Veeam" and "Kasten K10" have been replaced with "Veeam Kasten for Kubernetes." Throughout this documentation, references to "K10" will be modified to include both the new and simpler "Veeam Kasten" names. Both names will be used for a while, and then the documentation will be modified only to use the new names. The name K10 is still used for functional examples.
Operator based Installation
Veeam Kasten Operator Editions
The Veeam Kasten Operator is available within the Red Hat Operator Hub, which is bundled with the Kasten free license, allowing fully-featured Kasten for up to 5 nodes. An Enterprise license can be applied for full features and support beyond 5 worker nodes.
Pre-Flight Checks
Assuming that your default oc context is pointed to the cluster you want to install Veeam Kasten on, you can run pre-flight checks by deploying the primer tool. This tool runs in a pod in the cluster and does the following:
- Validates if the Kubernetes settings meet the Veeam Kasten requirements.
- Catalogs the available StorageClasses.
- If a CSI provisioner exists, it will also perform a basic validation of the cluster's CSI capabilities and any relevant objects that may be required. It is strongly recommended that the same tool be used to also perform a more complete CSI validation using the documentation here.
Note that this will create and clean up a ServiceAccount and ClusterRoleBinding to perform sanity checks on your Kubernetes cluster.
Run the following command to deploy the pre-check tool:
$ curl https://docs.kasten.io/downloads/9.0.1/tools/k10_primer.sh | bash
Prerequisites
Before installing Veeam Kasten, it is essential to have a functional and accessible Red Hat OpenShift environment.
Optionally, you can create a new project in advance where Veeam Kasten will be installed. Select this project during operator deployment, or create a project (namespace) during the operator installation process. By default, the documentation uses the kasten-io namespace.
oc new-project kasten-io \
  --description="Kubernetes data management platform" \
  --display-name="Veeam Kasten"
Veeam Kasten Installation
Interactive Demo
Step-by-Step Guide
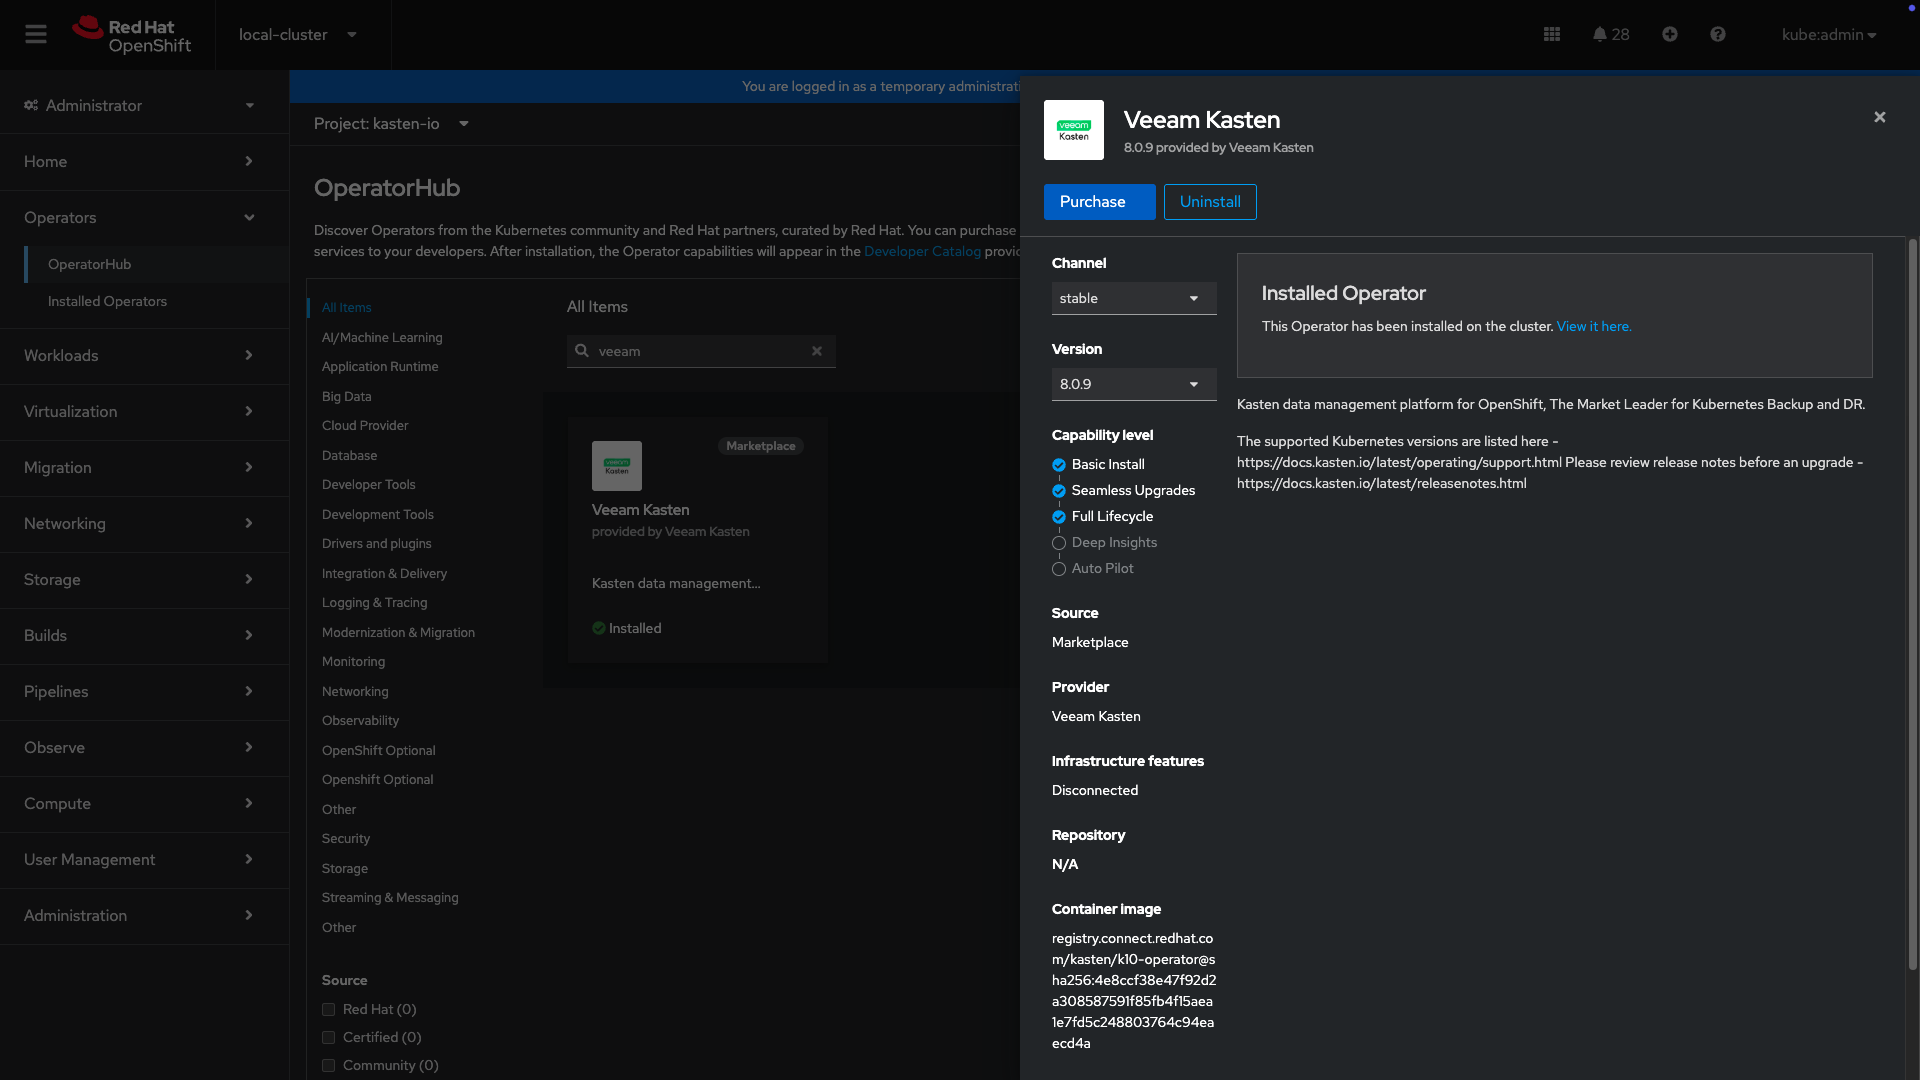
- Select the OperatorHub from the Operators Menu, search for Veeam Kasten. Select either the Certified Operator, or Marketplace version, depending on the requirements.
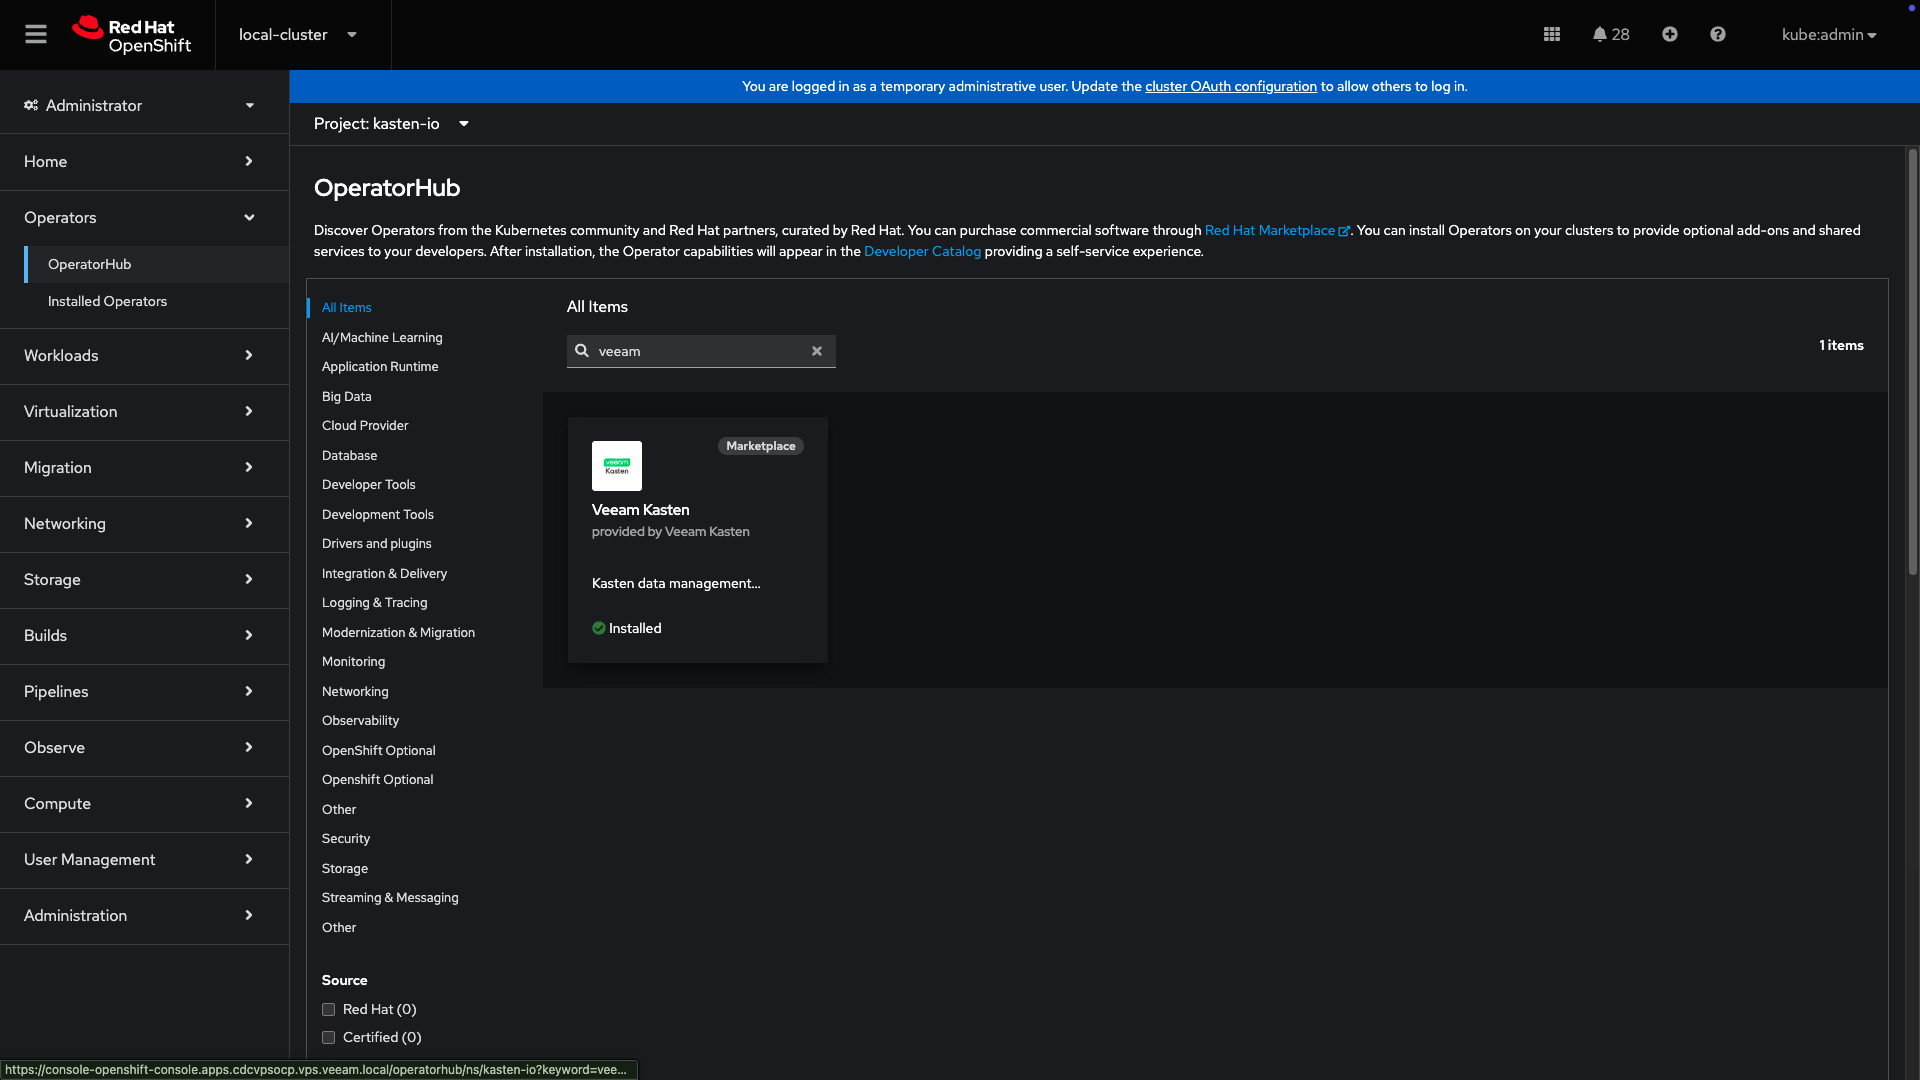
- To begin the installation, simply click
Install.
-
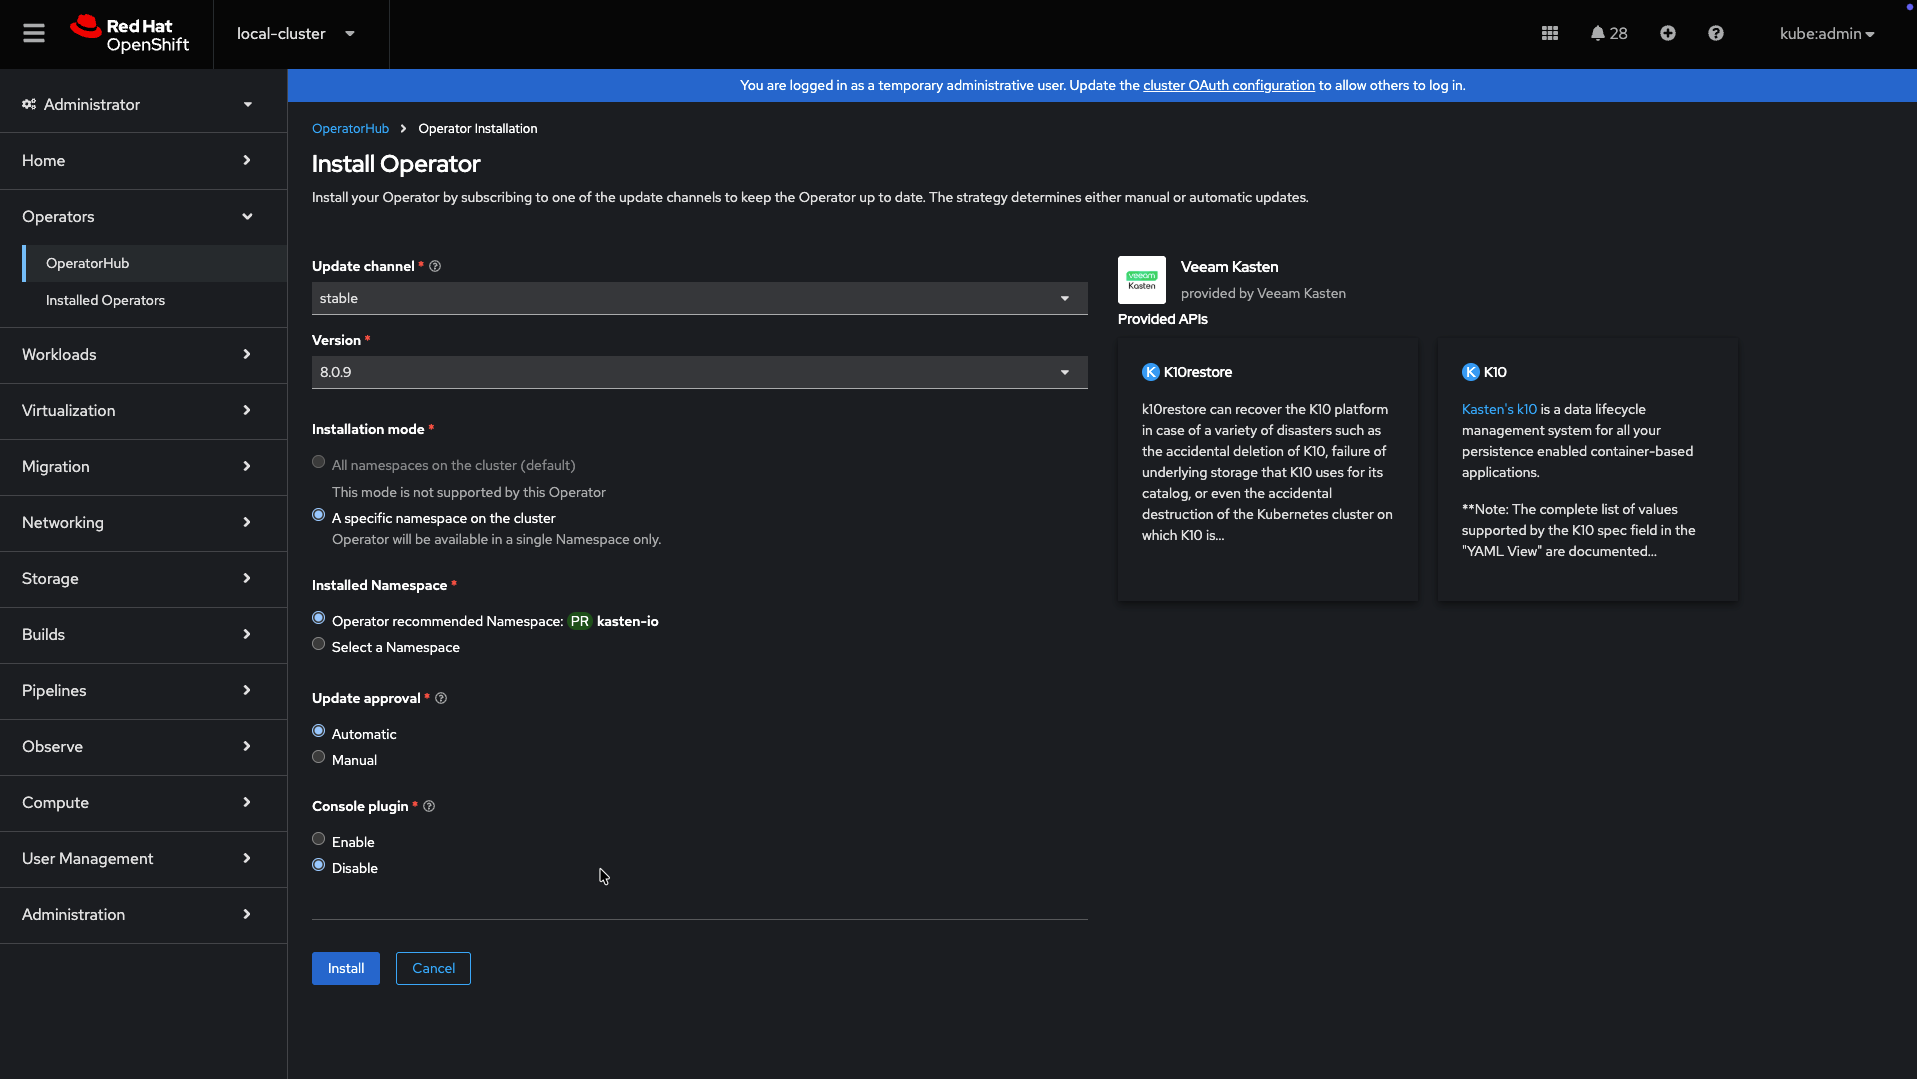
Next, set the channel to stable and the installation mode to
A specific namespace on the cluster. Choose thekasten-ioproject created in an earlier step. Optionally, enable the console plugin provided with the Veeam Kasten operator. For more information on the plugin, refer to the plugin documentation.
-
After installation, click
Create Instanceon the operator details page to create a Veeam Kasten instance.
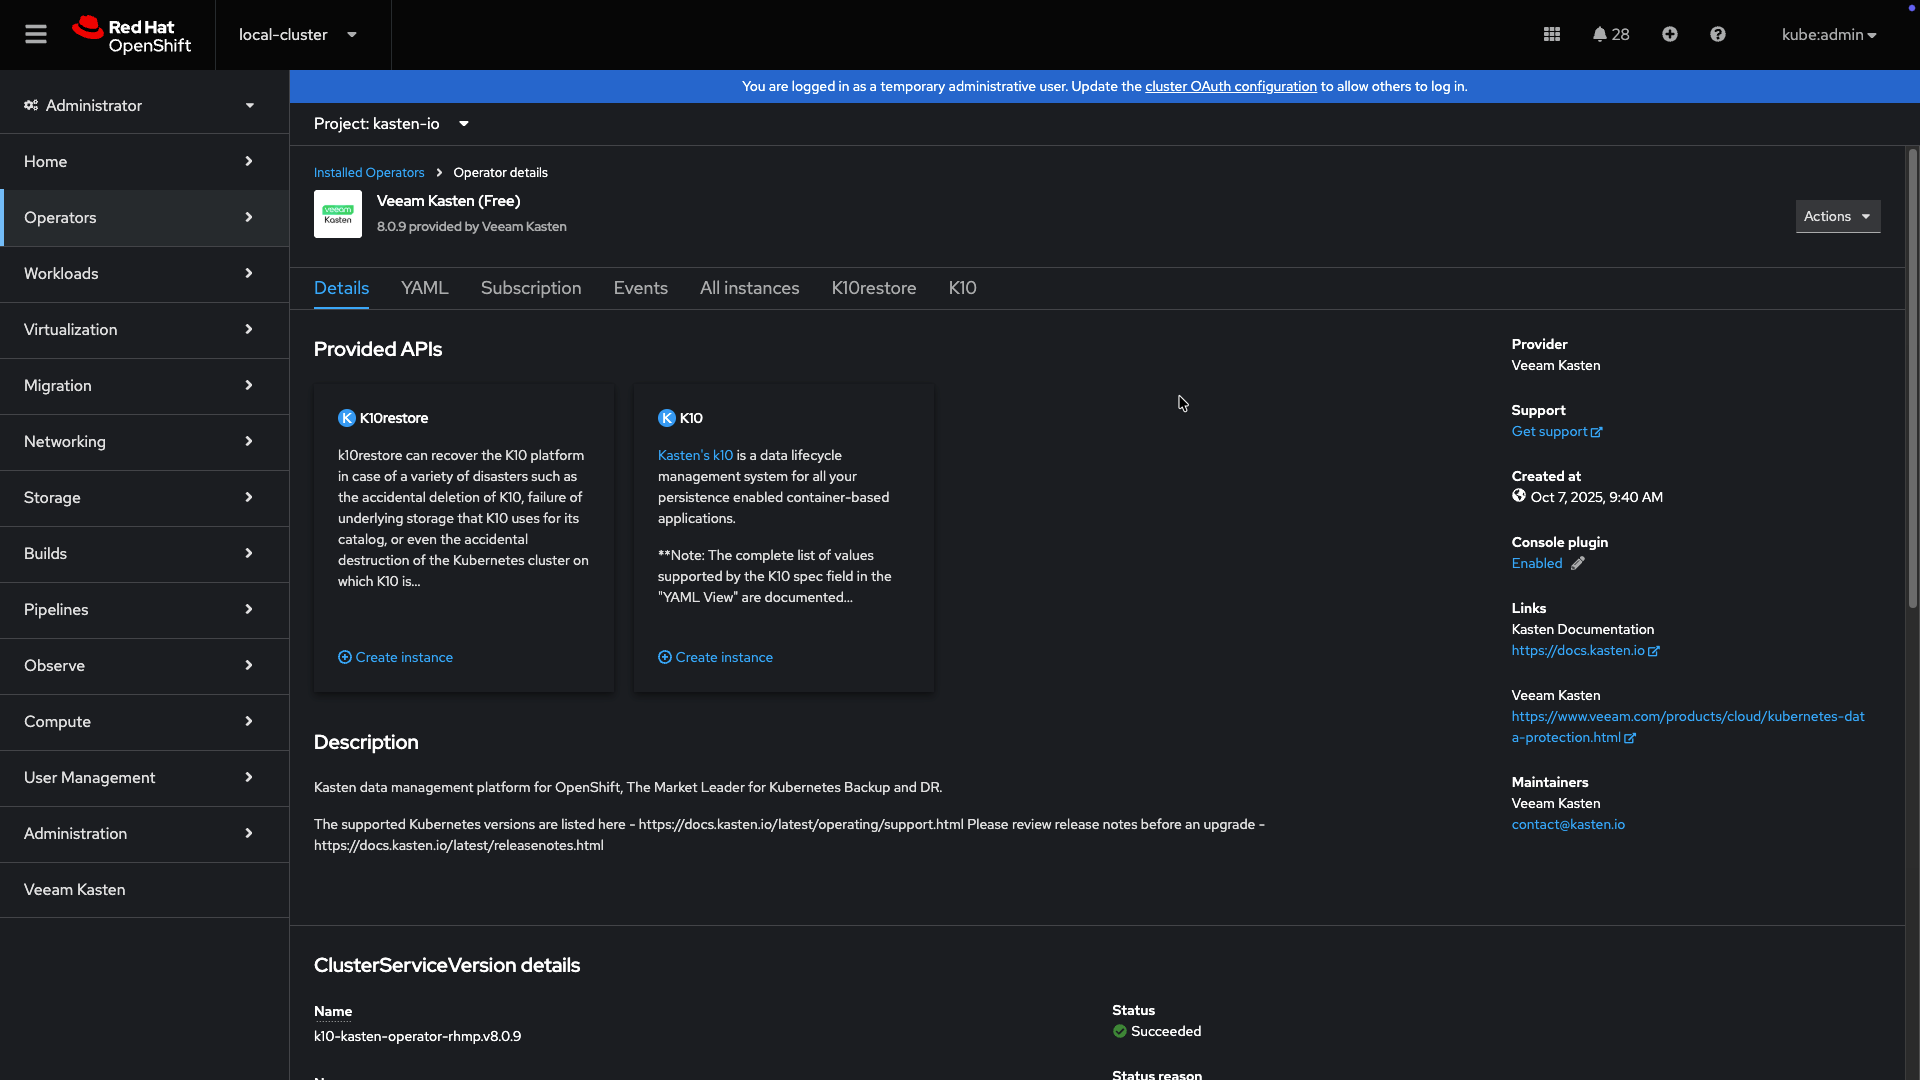
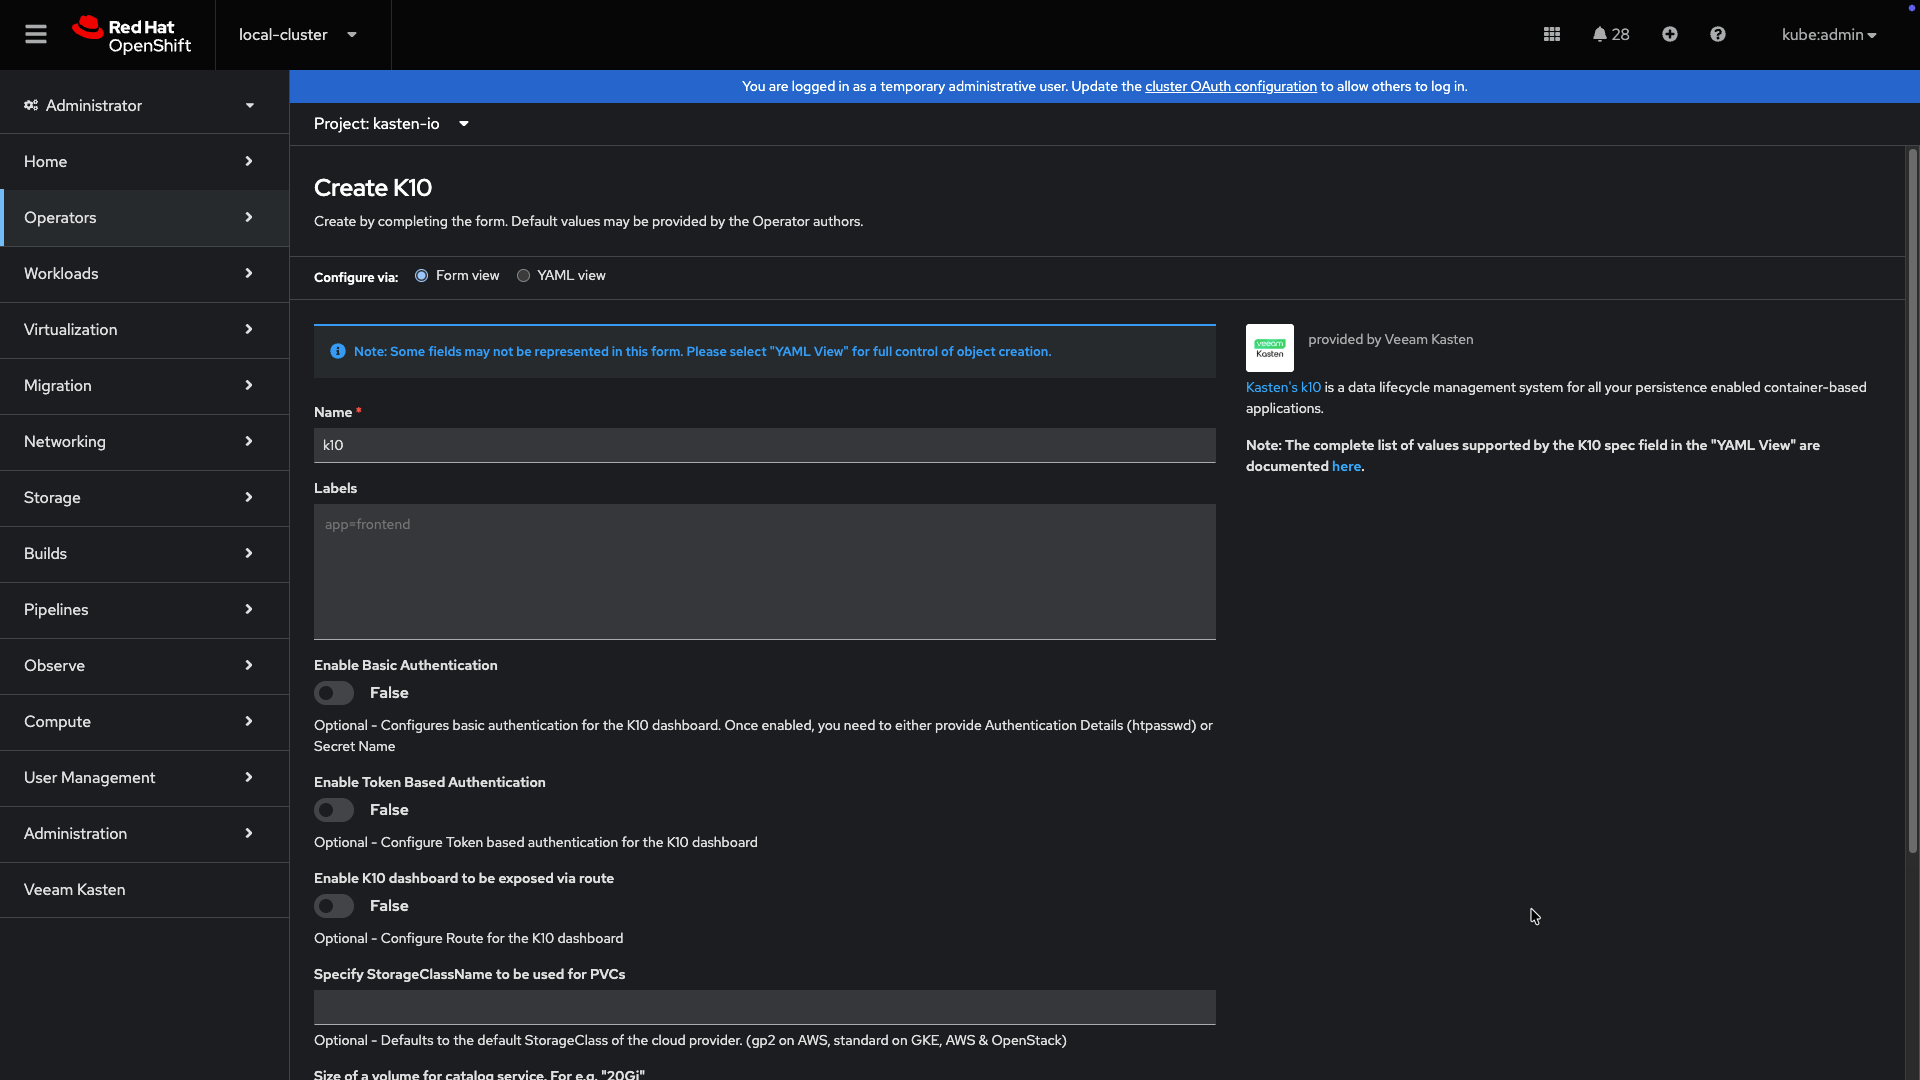
-
The default installation can be done through either the
Form VieworYAML View. By default, no changes are required to install.Veeam Kasten assumes that the default storage class is supported by SSDs or equivalent fast storage media. If this assumption is not true, please modify the installation values to specify a performance-oriented storage class. This modification can be done within the form view or directly within the YAML of the Veeam Kasten Operand configuration by setting the parameters below:
global:persistence:storageClass: <storage-class-name>
Offline Operator Install
To install the Veeam Kasten operator in a disconnected, or air-gapped, OpenShift environment, refer to the Red Hat documentation for details on mirroring OperatorHub registries and images to a private registry.
When directed to create an image set configuration, append k10-kasten-operator-rhmp to the list of operators as shown in the example below:
kind: ImageSetConfiguration
apiVersion: mirror.openshift.io/v2alpha1
mirror:
  platform:
    channels:
    - name: stable-4.19
      minVersion: 4.19.2
      maxVersion: 4.19.2
    graph: true
  operators:
    - catalog: registry.redhat.io/redhat/redhat-operator-index:v4.19
      packages:
       - name: aws-load-balancer-operator
       - name: 3scale-operator
       - name: node-observability-operator
       - name: k10-kasten-operator-rhmp
  additionalImages:
   - name: registry.redhat.io/ubi8/ubi:latest
   - name: registry.redhat.io/ubi9/ubi@sha256:20f695d2a91352d4eaa25107535126727b5945bff38ed36a3e59590f495046f0
The Veeam Kasten operator may be now installed from the OperatorHub using the mirrored images.
Follow the steps under operator install to continue installing Veeam Kasten.
Other Installation Options
For a complete list of installation options, please visit our advanced installation page.
After installing the "Veeam Kasten (Enterprise - PAYGO)" edition, if the warning message "Unable to validate Red Hat Marketplace license" is displayed on the Veeam Kasten dashboard, please verify the cluster is registered with Red Hat Marketplace and the Red Hat Marketplace Operator is installed, and then re-install Veeam Kasten.
OpenShift on AWS
When deploying OpenShift on AWS without using the EBS CSI driver for persistent storage, make sure that you configure these policies before executing the installation command provided below:
$ helm install k10 kasten/k10 --namespace=kasten-io \
    --set scc.create=true \
    --set secrets.awsAccessKeyId="${AWS_ACCESS_KEY_ID}" \
    --set secrets.awsSecretAccessKey="${AWS_SECRET_ACCESS_KEY}"
Securing Veeam Kasten with SecurityContextConstraints
Veeam Kasten installs customized SecurityContextConstraints (SCC) to
ensure that all workloads associated with Veeam Kasten have just enough
privileges to perform their respective tasks.
For additional information about SCCs, please refer to the official OpenShift documentation
Starting with OpenShift 4.14, a new
openshift.io/required-scc annotation was introduced. Veeam
Kasten applies this annotation to its own pods to ensure that the
correct SecurityContextConstraints (SCC) have been applied.
Please note that pods created for Kanister Execution Hooks execution will not receive the openshift.io/required-scc annotation. For more information, visit the Managing security context constraints.
SecurityContextConstraints Customization
The value of the Priority field in SecurityContextConstraints can be adjusted to align the priority with the existing cluster configuration.
To set the desired Priority value in an Operator-managed installation, modify the YAML of the Veeam Kasten Operand configuration with the parameters below:
scc:
  priority: <priority_value>
This customization can be achieved in a Helm-based installation by adding the following parameter to the Helm command:
--set scc.priority=<priority_value>
If required, allowing the use of CSI ephemeral volumes can be enabled in the SecurityContextConstraints
configuration. This will update the volumes section of the k10-scc SecurityContextConstraints
to include csi.
To allow CSI ephemeral volumes in an Operator-managed installation, modify the YAML of the Veeam Kasten Operand configuration with the parameters below:
scc:
      allowCSI: true
This customization can be enabled in a Helm installation by adding the following parameter to the Helm command:
--set scc.allowCSI=true
SecurityContextConstraints Leakage
OpenShift assigns SCC to workloads automatically. By default, the most restrictive SCC matching a workload security requirement will be selected and assigned to that workload. One of the criteria for SCC selection is the availability of the SCC to a User or ServiceAccount. SCC leakage means that some workloads might get an SCC applied to them, which was not the intended one.
Veeam Kasten protects its SCC from leaking onto other workloads by limiting access only to its dedicated ServiceAccount:
users:
  - system:serviceaccount:kasten-io:executor-svc  # example of a Veeam Kasten service account
  # all Veeam Kasten service accounts will be listed as users
In this example, and in the rest of this page, Veeam Kasten is installed
into the namespace kasten-io (default). If the cluster being considered
has a different configuration, those values need to be adapted to match
the values used during Veeam Kasten's installation in this cluster.
Despite the usage restrictions, it is still possible to get Veeam
Kasten's SCC assigned to other workloads. This could happen when a
workload is started by a cluster admin or any other user with an allowed
use action on all SCCs (*) or on Veeam Kasten's specific SCC
(k10-scc). This is because users with the ClusterRole
cluster-admin bound to them have unlimited access to all
available SCCs, without any restrictions.
Veeam Kasten's SCC may be unexpectedly applied to workloads it was not intended for under the following conditions:
- The workload is initiated by a user with cluster admin privileges
- The user initiating the workload has a role that grants access to all SCCs
Validating SecurityContextConstraints Access
OpenShift's command line (CLI) client, oc, has a can-i command that
can be used with impersonation to check if a user can perform a specific
action on a specific resource. Alternatively, the standard
kubectl CLI client also has the same command built-in and
can be used to perform the same check. Simply replace oc
with kubectl in the command below.
To check if a user can use/access Veeam Kasten's SCC, the following command can be used:
oc auth can-i use securitycontextconstraints/k10-scc --as=<your_username>
The output will contain yes if the specified user is able to use Veeam
Kasten's SCC or no if it is not. For example, the output for the
following check, "Can Veeam Kasten's ServiceAccount use Veeam
Kasten's SCC", should be yes:
oc auth can-i use securitycontextconstraints/k10-scc --as=system:serviceaccount:kasten-io:executor-svc
Note that executor-svc is just one of the Veeam Kasten service accounts created for a default install.
Detailed information about can-i and impersonation can be found in
the official Kubernetes
documentation.
Accessing Dashboard via Route
As documented here, the Veeam Kasten dashboard can also be accessed via an OpenShift Route.
Authentication
OpenShift OAuth server
As documented here, the OpenShift OAuth server can be used to authenticate access to Veeam Kasten.
Using an OAuth Proxy
As documented here, the OpenShift OAuth proxy can be used for authenticating access to Veeam Kasten.
Validating the Install
To validate that Veeam Kasten has been installed properly, the following
command can be run in Veeam Kasten's namespace (the install default is
kasten-io) to watch for the status of all Veeam Kasten pods:
$ kubectl get pods --namespace kasten-io --watch
It may take a couple of minutes for all pods to come up but all pods
should ultimately display the status of Running.
$ kubectl get pods --namespace kasten-io
NAMESPACE     NAME                                    READY   STATUS    RESTARTS   AGE
kasten-io     aggregatedapis-svc-b45d98bb5-w54pr      1/1     Running   0          1m26s
kasten-io     auth-svc-8549fc9c59-9c9fb               1/1     Running   0          1m26s
kasten-io     catalog-svc-f64666fdf-5t5tv             2/2     Running   0          1m26s
...
In the unlikely scenario that pods that are stuck in any other state, please follow the support documentation to debug further.
Validate Dashboard Access
By default, the Veeam Kasten dashboard will not be exposed externally.
To establish a connection to it, use the following kubectl command to
forward a local port to the Veeam Kasten ingress port:
$ kubectl --namespace kasten-io port-forward service/gateway 8080:80
The Veeam Kasten dashboard will be available at http://127.0.0.1:8080/k10/#/.
For a complete list of options for accessing the Kasten Veeam Kasten dashboard through a LoadBalancer, Ingress or OpenShift Route you can use the instructions here.
Using Veeam Kasten Console Plugin
The Veeam Kasten operator includes the OpenShift Console Plugin, providing faster and more convenient access to the essential data about the Veeam Kasten application state.
Enable Veeam Kasten Console Plugin
The Veeam Kasten Console Plugin can be enabled during the installation of the Veeam Kasten operator. For more details, see Veeam Kasten Installation.
To enable the plugin for existing K10 deployments, navigate to the Operator Details page for Veeam Kasten operator in the OpenShift Console. In the Console Plugin section on the right-hand side, select the Enabled checkbox.
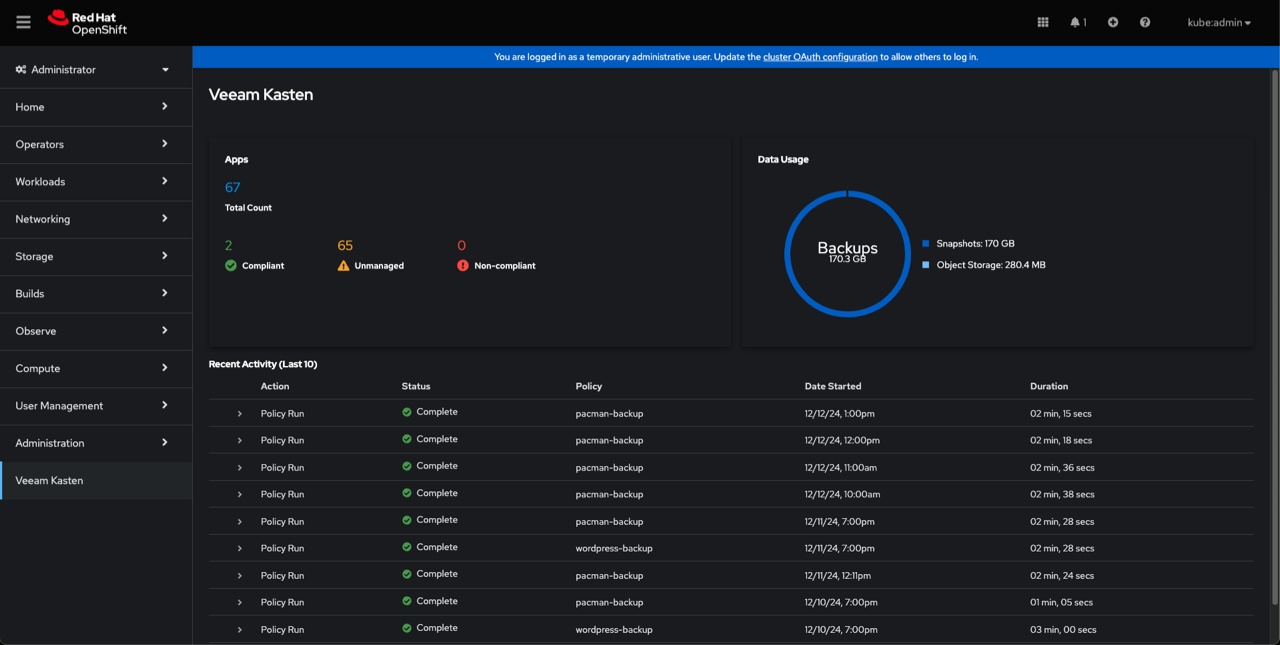
Veeam Kasten Console Plugin UI Overview
The Veeam Kasten Console Plugin adds a new Veeam Kasten tab to the
OpenShift Web Console panel on the left. Click on the tab to open the
plugin. The plugin UI contains all the essential data from the
Veeam Kasten Dashboard,
including the system overview and the recent activity.