AWS EFS Workaround
Using the Veeam Kasten dashboard and AWS CLI for EFS Snapshot Migration
Before starting, make sure the right security group has been created on the AWS console with an NFS rule added to it. Follow steps 1 to 4 provided here to create a new security group.
On the source cluster, follow the instructions provided for Exporting Applications.
On the target cluster follow the instructions provided below:
-
Create an import policy. Do not select
Restore After Import. -
Create the namespace (name must be identical as the source cluster) in which the snapshot has to be restored. Once the namespace is created, it will appear as an application on the Veeam Kasten Dashboard.
-
For the restore, go to
Applications→your_namespace→RestoreSelect a restore point. From details, deselectSpec Artifactsand deselectVolume Snapshots. Only the StorageClass has to be restored first and therefore only that should be selected from the list of specs. ClickRestore.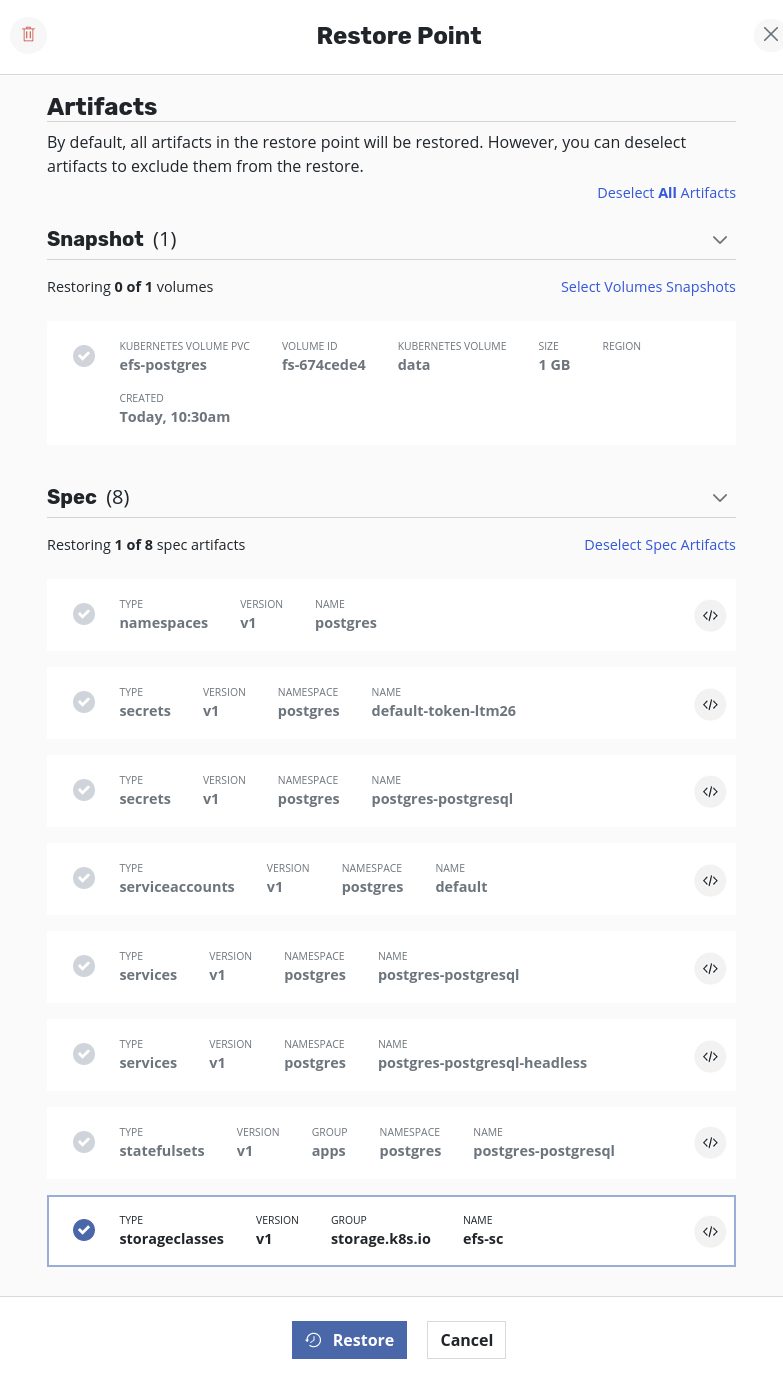
-
Once the restore job is successful, volumes can be restored. To accomplish that, select the same restore point as before but this time,
Deselect Spec Artifactsand clickRestore.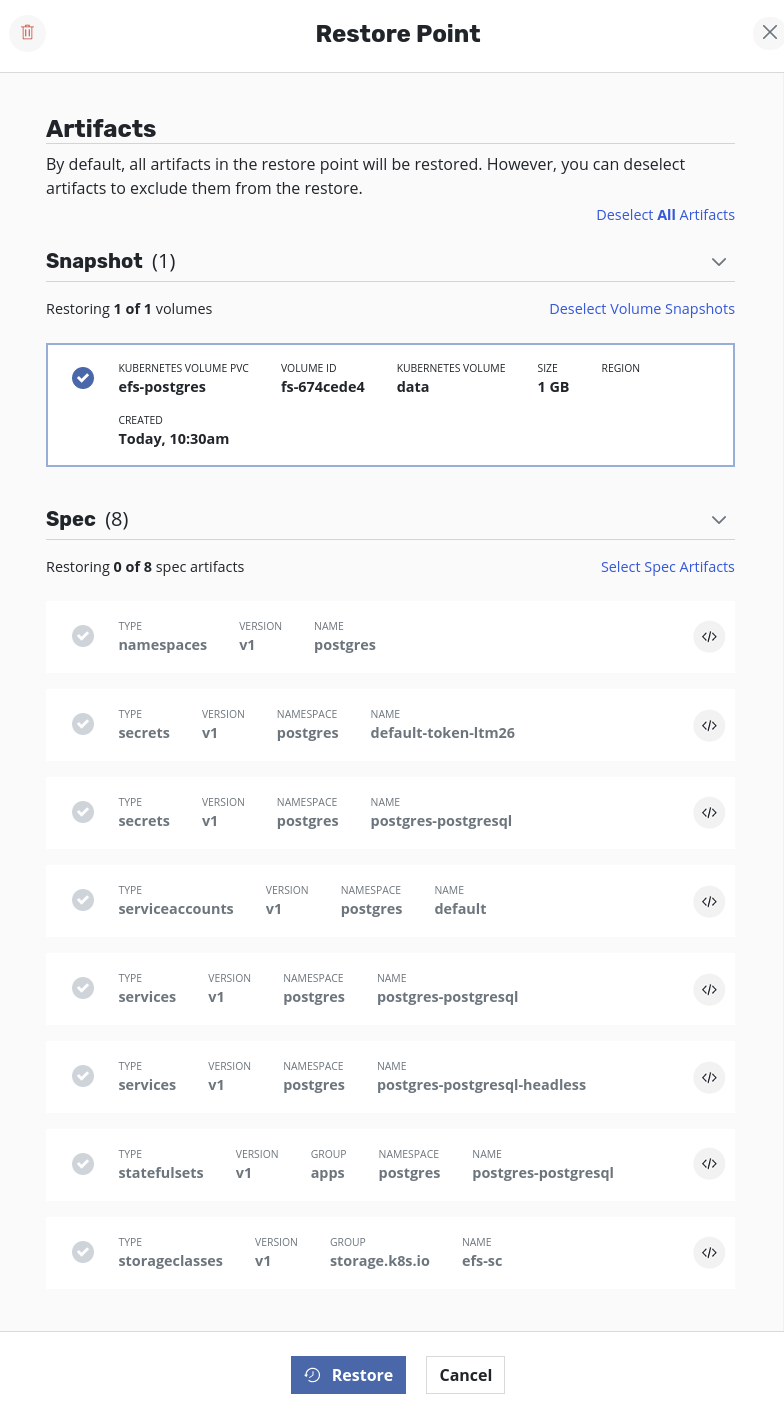
-
Wait till the
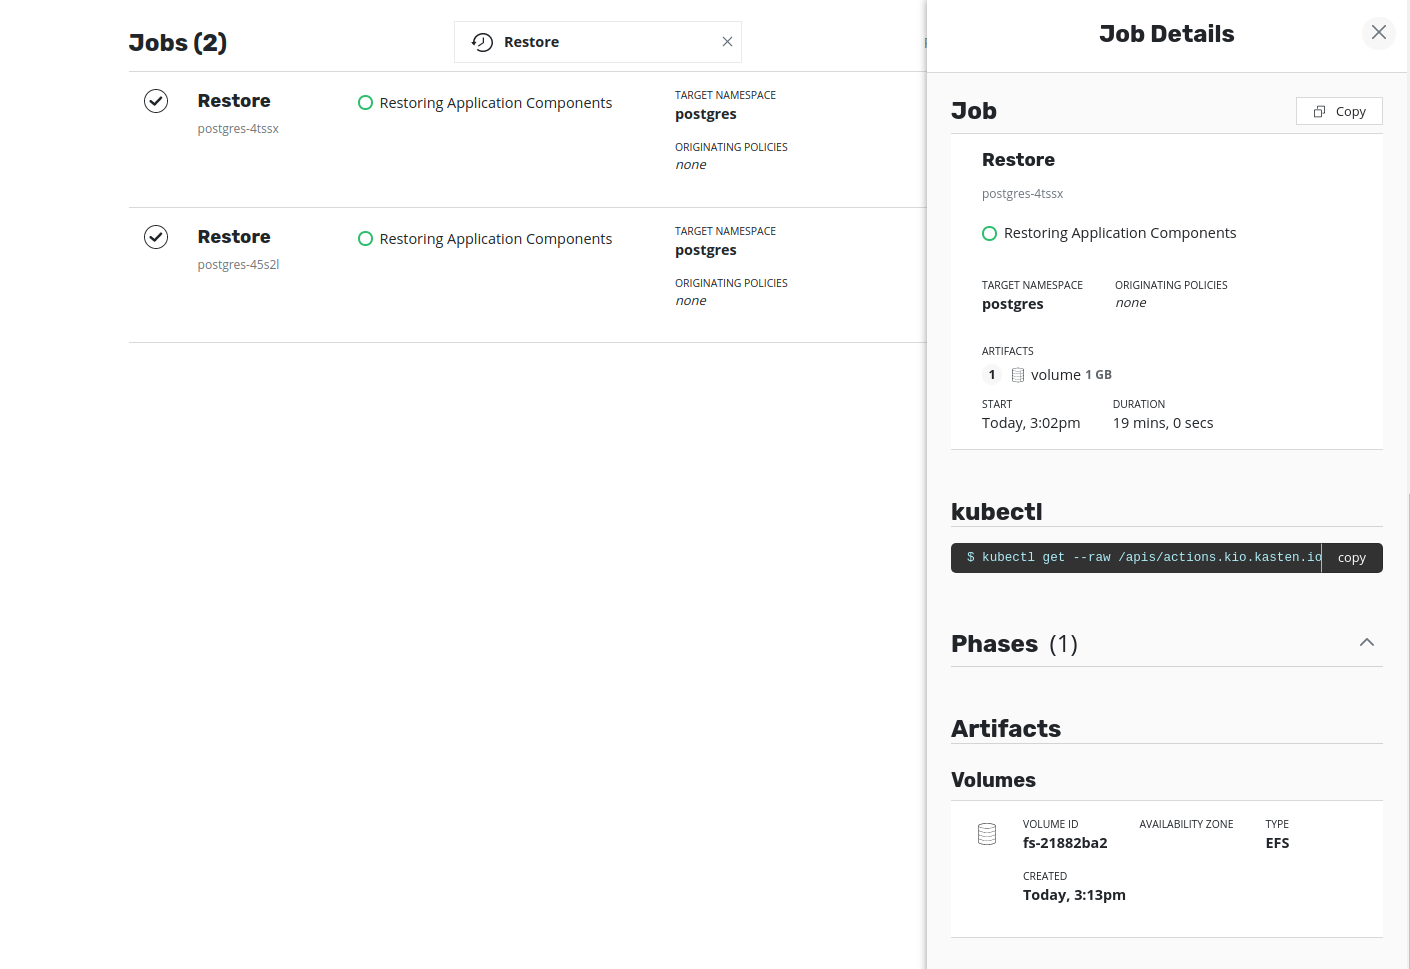
Volumeartifacts are set during the process. The job artifacts can be seen by clicking on the restore job. Once the Volumes artifacts are set, the Volume ID (i.e thefile-system-id) will be visible in the description.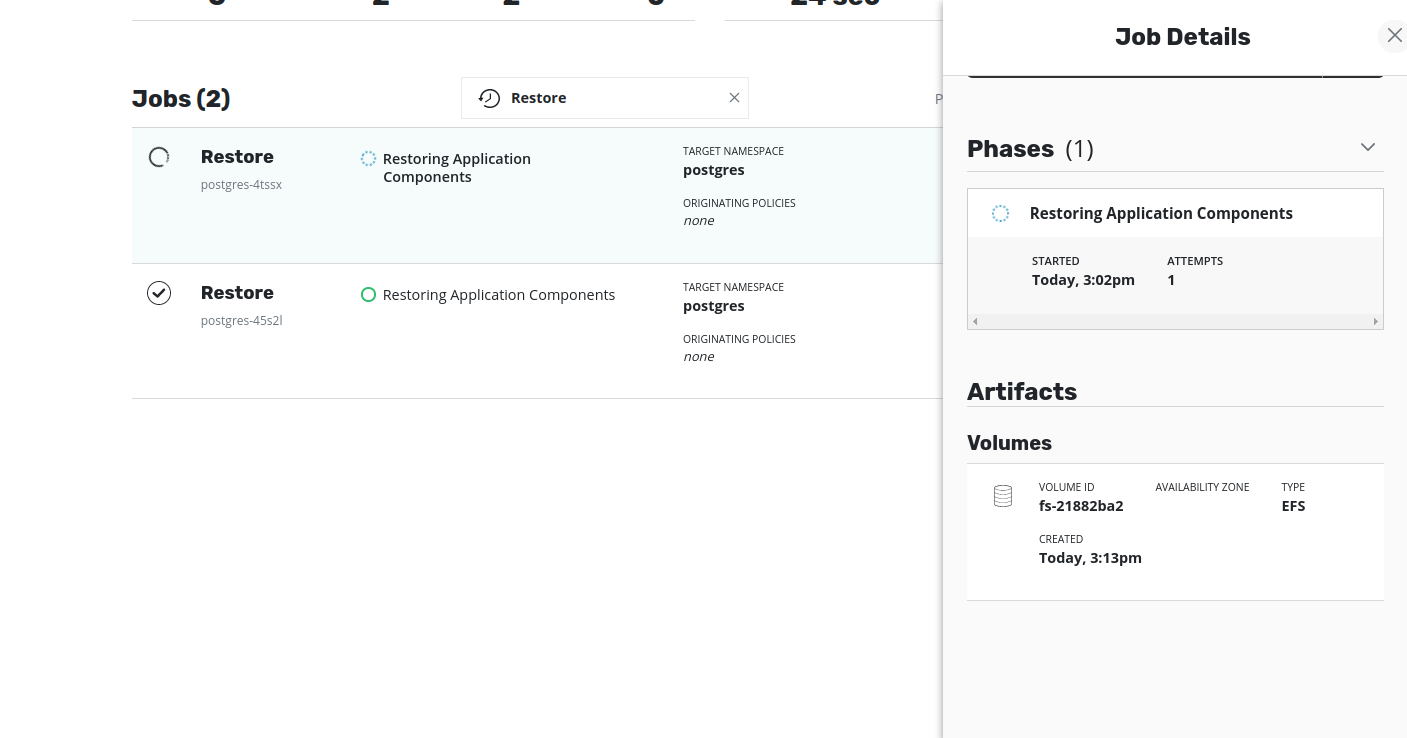
The EFS volume will have been created in the target cluster but is linked to the VPC of the source cluster. As a result, this restored EFS volume will not be accessible to any application running in the target cluster. In other words, an attempt to restore the application will result in failure to bind the pods to the restored PVC. Hence, to restore the application successfully in the target cluster, the restored EFS volume should be made available from the target VPC. This can be achieved by updating the VPC and mount targets of the restored EFS volume using AWS CLI (or AWS Console).
The volume restore job waits for the VPC and mount targets of the restored EFS volume to be updated. If it's not done within 45 minutes, the job gets terminated.
- Delete the mount targets and create a new mount target in each Availability Zone using the target security groups and subnet. Use the following AWS CLI commands to update the mount target, so that the volume is mounted from target VPC:
Get the current mount target IDs to be deleted. There will be one mount target per Availability Zone.
$ aws efs describe-mount-targets --file-system-id fs-exampleid --region <target-cluster-region>

Delete all mount targets using the MountTargetIds that were shown above:
$ aws efs delete-mount-target  --mount-target-id fsmt-0000000  --region <target-cluster-region>
$ aws efs delete-mount-target  --mount-target-id fsmt-0000001  --region <target-cluster-region>
$ aws efs delete-mount-target  --mount-target-id fsmt-0000002  --region <target-cluster-region>

Get subnet-ids using VPC-id and region of target cluster:
$ aws ec2 describe-subnets --filters "Name=vpc-id,Values=vpc-0c00000000example" --region <target-cluster-region>

Select one subnet-ID per availability zone. Then, create mount targets in each availability zone.
Use the security group id of the security group created with the NFS rule type. You can also add the default
security group to the command along with the one that you created. Assuming there are three Availability Zones:
$ aws efs create-mount-target --file-system-id fs-example-id --subnet-id subnet-00000000000000000 --security-group sg-00000000000000000 sg-default --region <target-cluster-region>
$ aws efs create-mount-target --file-system-id fs-example-id --subnet-id subnet-11111111111111111 --security-group sg-00000000000000000 sg-default --region <target-cluster-region>
$ aws efs create-mount-target --file-system-id fs-example-id --subnet-id subnet-22222222222222222 --security-group sg-00000000000000000 sg-default --region <target-cluster-region>
-
When EFS volumes become mountable from the target VPC, the volume restore job becomes successful.
-
Once the volume restore job is successful, applications can be restored. To restore, select
Applications→your_namespace→Restore. Select the restore point that was selected earlier. In the restore point details, deselectVolume Snapshotsand clickRestore. -
Once the pods are created, they should be successfully bound to their respective PVCs.
Using the Veeam Kasten dashboard and AWS Console for EFS Snapshot Migration
Follow the steps outlined above to export the application from the source cluster to the target cluster and then to run restore actions to restore StorageClass and volume. Obtain the Volume ID (i.e., the file-system-id) from the restore job description.
To update the mount targets using the AWS Console instead of the AWS CLI follow the instructions below:
-
Log in to the AWS Console Use the
file-system-idof the restored volume to select the correct EFS on the AWS console. Click onActions→Manage Network Access. -
The console displays the list of Availability Zones and mount target information. It will also display the VPC of source cluster. Click
X(left hand-side of AZ column) to remove all mount targets, thenSave.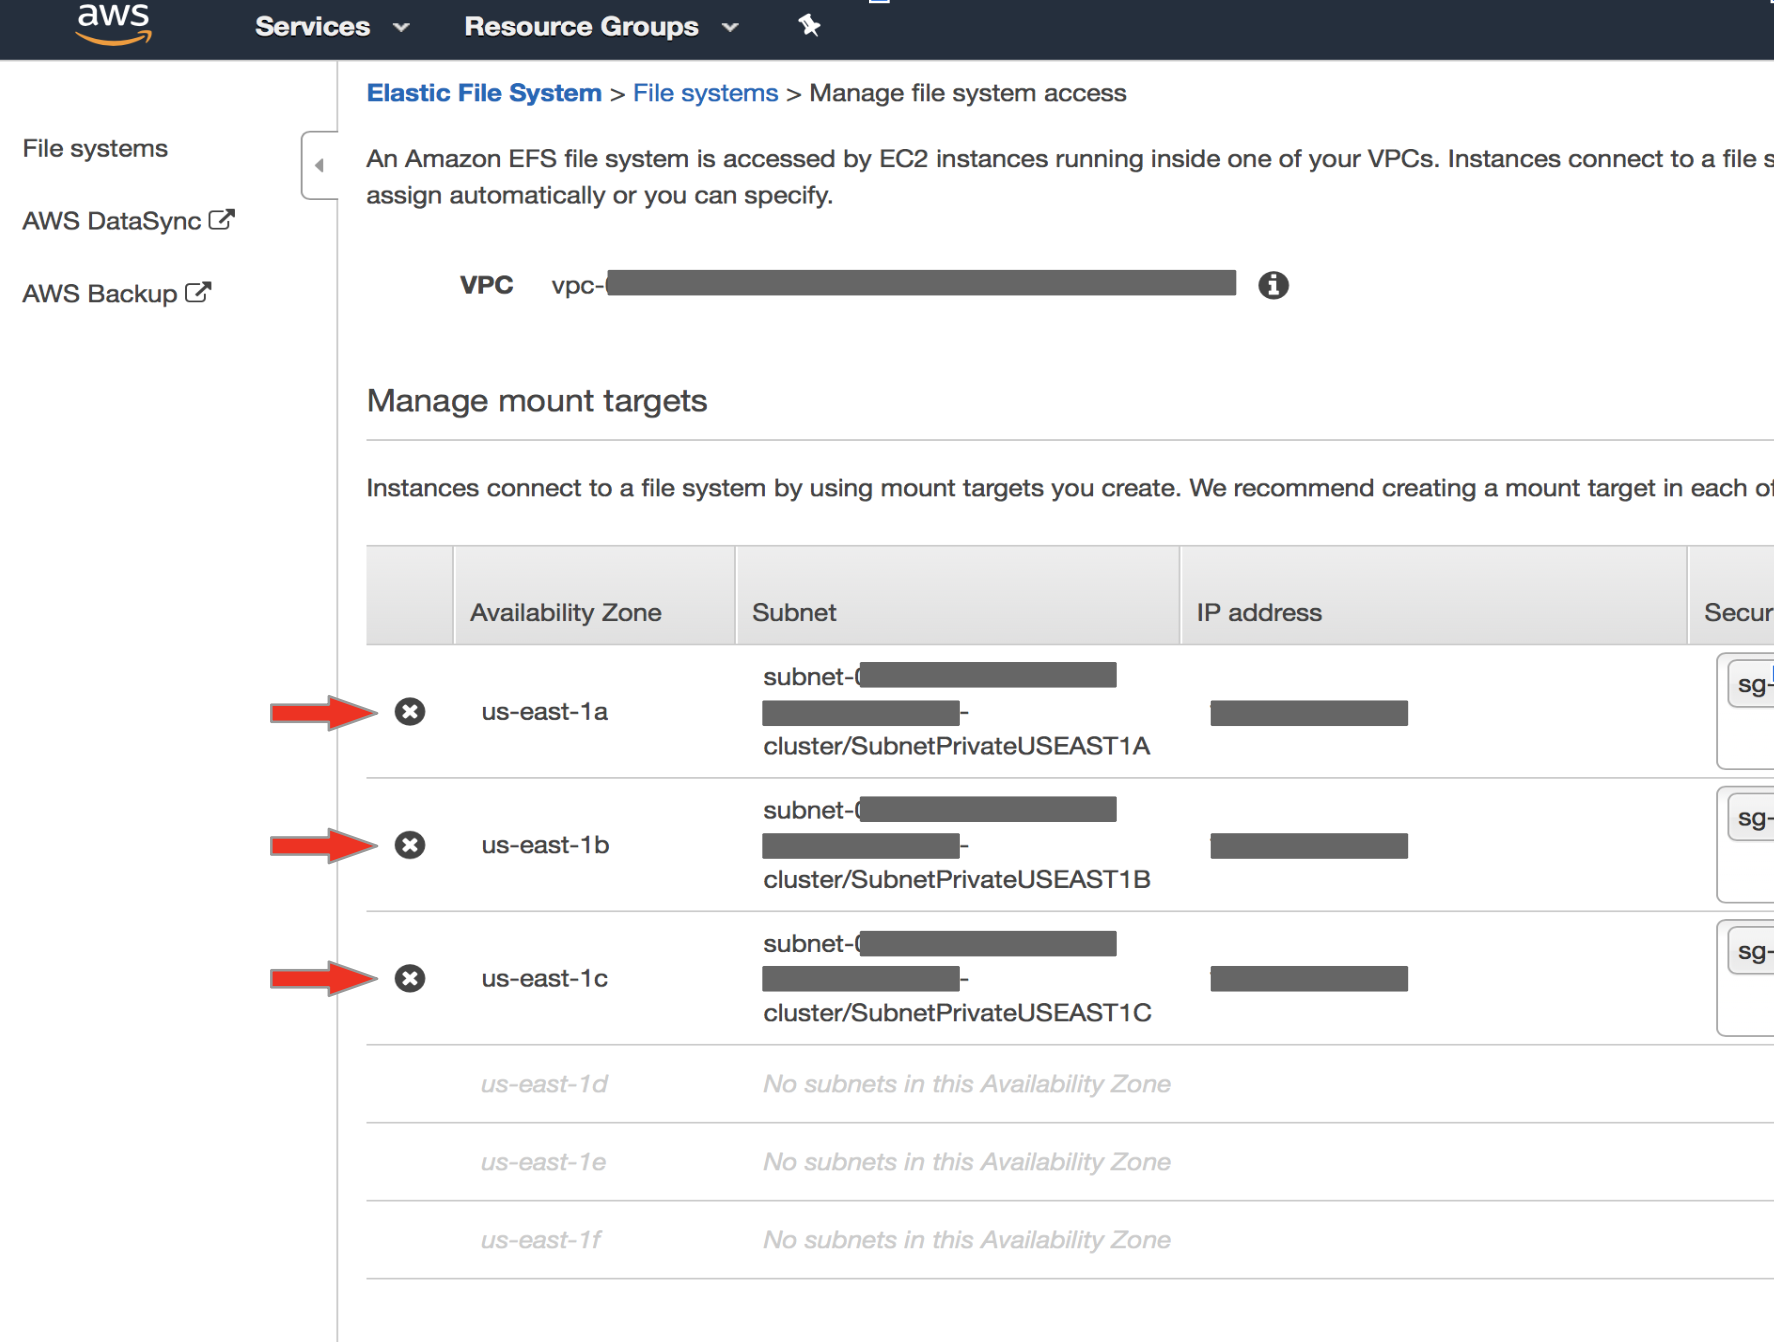
-
Once they are deleted, click on
Actions→Manage Network Accessto create new mount targets. Then, select the VPC of the target cluster. Click on the+sign to the left of AZ to add new mount targets. Select the security group (target cluster) that was created with type NFS, and clickSave.
From the Veeam Kasten dashboard, follow the steps outlined earlier to restore applications.