Operator based Installation
Pre-Flight Checks
Assuming that your default oc context is pointed to the cluster you want to install K10 on, you can run pre-flight checks by deploying the primer tool. This tool runs in a pod in the cluster and does the following:
Validates if the Kubernetes settings meet the K10 requirements.
Catalogs the available StorageClasses.
If a CSI provisioner exists, it will also perform a basic validation of the cluster's CSI capabilities and any relevant objects that may be required. It is strongly recommended that the same tool be used to also perform a more complete CSI validation using the documentation here.
Note that this will create, and clean up, a ServiceAccount and ClusterRoleBinding to perform sanity checks on your Kubernetes cluster.
Run the following command to deploy the the pre-check tool:
$ curl https://docs.kasten.io/tools/k10_primer.sh | bash
Prerequisites
You need to create the project where Kasten will be installed. By default, the documentation uses kasten-io.
oc new-project kasten-io \
  --description="Kubernetes data management platform" \
  --display-name="Kasten K10"
K10 assumes that the default storage class is backed by SSDs or similarly fast storage media. If that is not true, please modify the installation values to specify a performance-oriented storage class.
global:
  persistence:
    storageClass: <storage-class-name>
K10 Install
Select the OperatorHub from the Operators Menu, search for Kasten. Select either the Certified Operator, or Marketplace version depending on your requirements
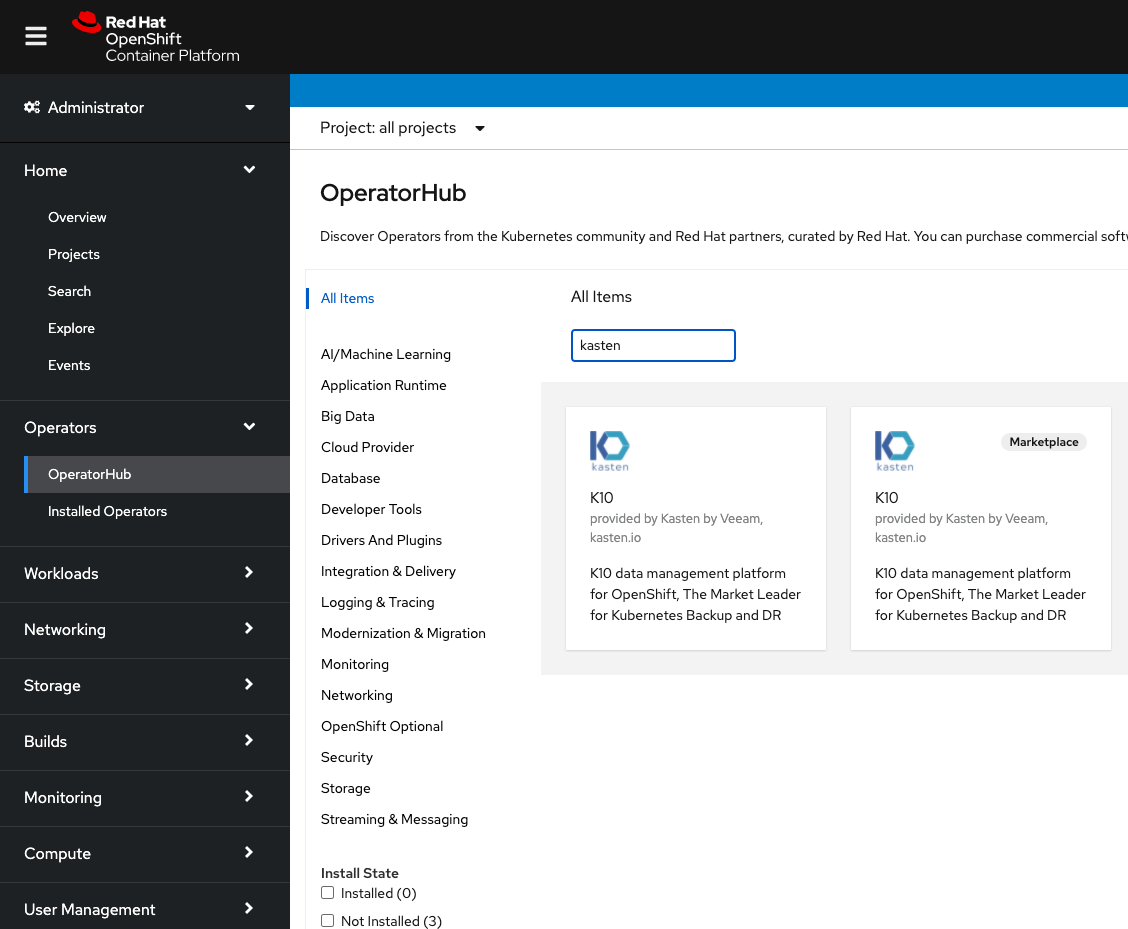
To begin the installation, simply click “Install”
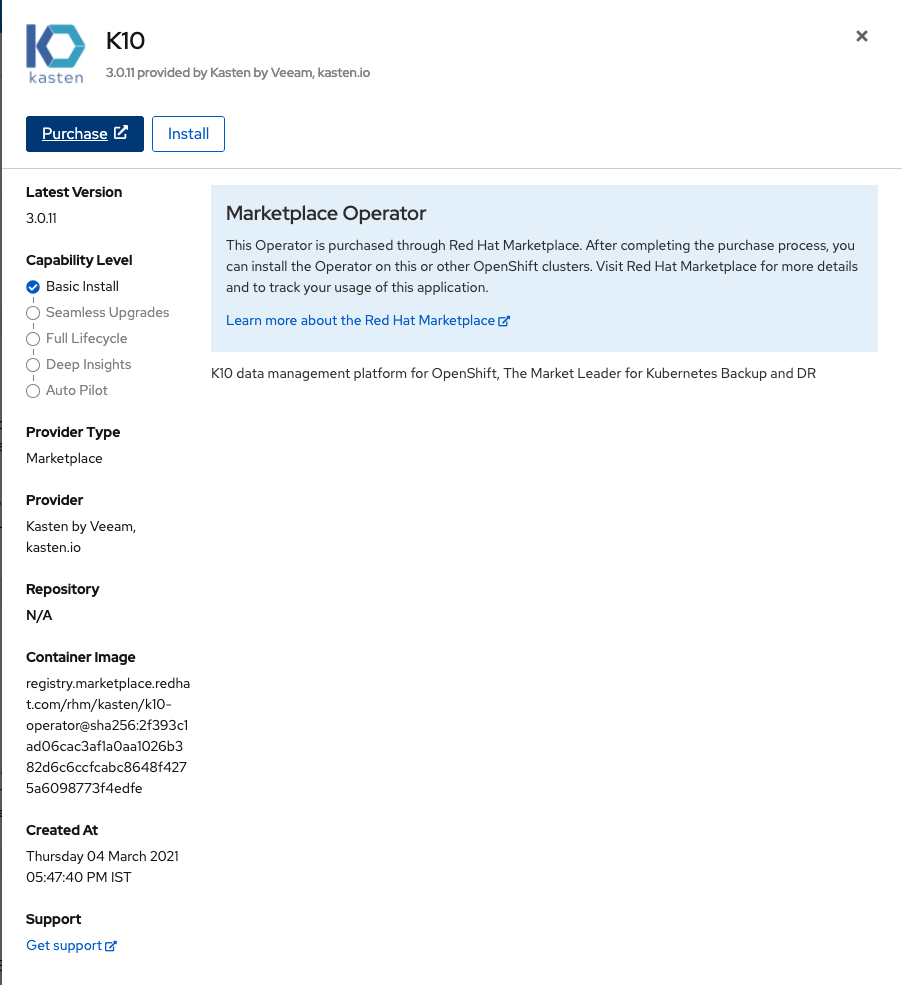
Next set the channel to stable and installation mode to “A specific namespace on the cluster” choose the kasten-io project created in an earlier step.
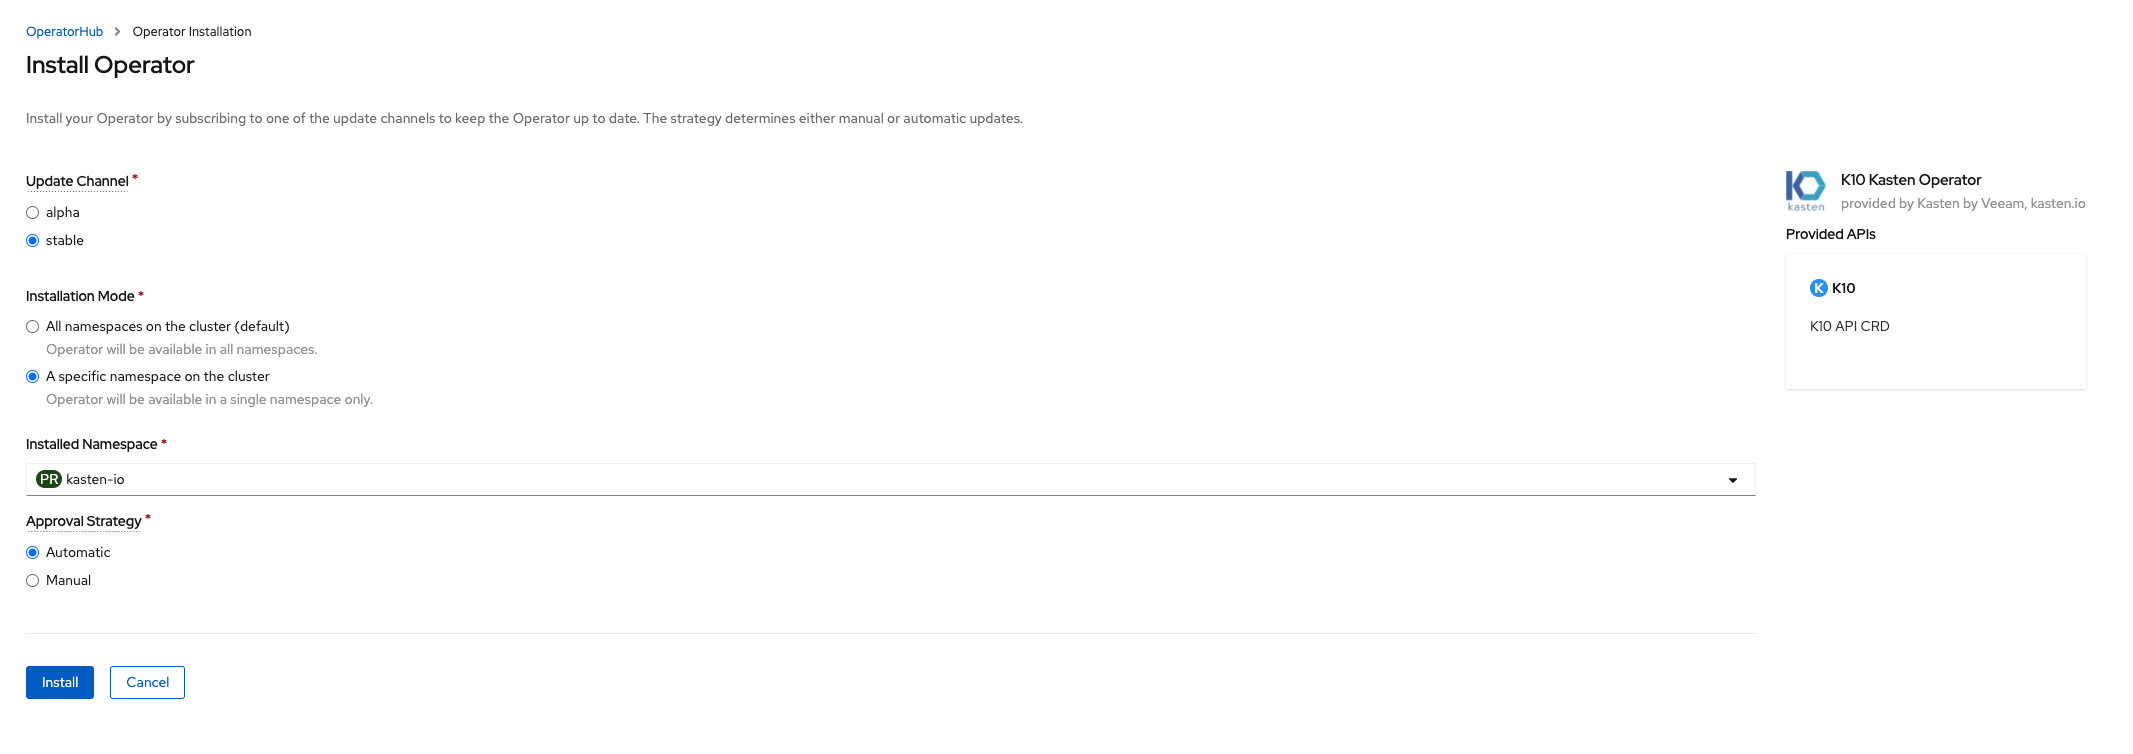
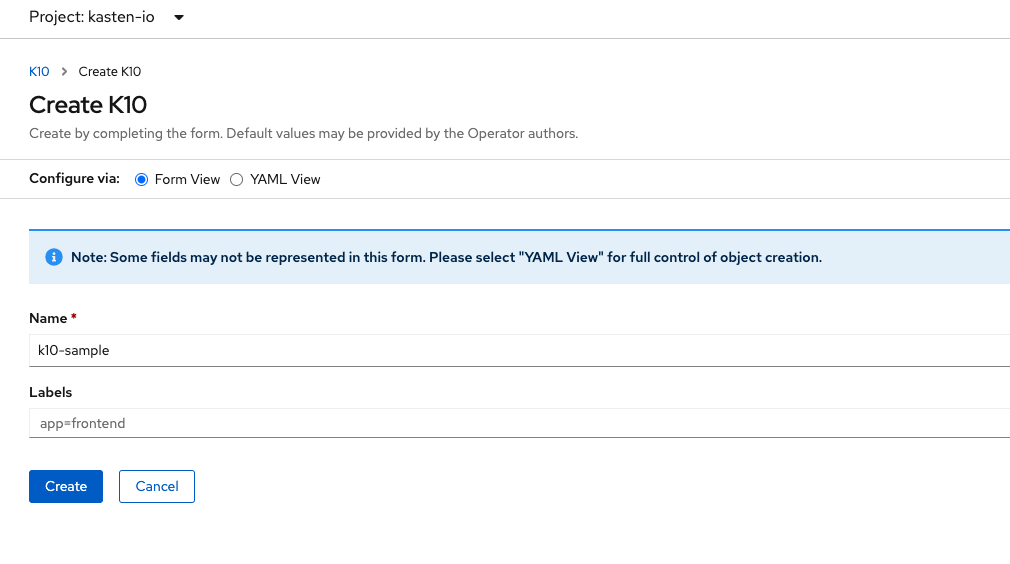
Once installed you are able to create a K10 instance from the operator, to do so click “Create Instance” from the operator details page
The default installation can be done through either the “Form View” or “YAML View” There are no changes needed to install by default.
Other Installation Options
For a complete list of installation options please visit our advanced installation page.
OpenShift on AWS
When running OpenShift on AWS, please configure these policies before running the install command below.
$ helm install k10 kasten/k10 --namespace=kasten-io \
    --set scc.create=true \
    --set secrets.awsAccessKeyId="${AWS_ACCESS_KEY_ID}" \
    --set secrets.awsSecretAccessKey="${AWS_SECRET_ACCESS_KEY}"
OpenShift and CSI
Note
The feature flag mentioned below is only required for OpenShift 4.4 and earlier.
To use OpenShift and K10 with CSI-based volume snapshots,
the VolumeSnapshotDataSource feature flag needs to be
enabled. From the OpenShift management console, as an administrator,
select Administration → Cluster Settings → Global
Configuration → Feature Gate → YAML. The resulting
YAML should look like:
apiVersion: config.openshift.io/v1
kind: FeatureGate
metadata:
  annotations:
    release.openshift.io/create-only: 'true'
name: cluster
spec:
  customNoUpgrade:
    enabled:
      - VolumeSnapshotDataSource
  featureSet: CustomNoUpgrade
Accessing Dashboard via Route
As documented here, the K10 dashboard can also be accessed via an OpenShift Route.
Authentication
Kanister Sidecar Injection on OpenShift 3.11
To use the K10 Kanister sidecar injection feature on OpenShift 3.11, make sure that the MutatingAdmissionWebhook setting is enabled. If not, follow the steps below to enable it:
On a control plane node, add the following config to the admissionConfig.pluginConfig section of the /etc/origin/master/master-config.yaml file:
MutatingAdmissionWebhook:
  configuration:
    apiVersion: v1
    disable: false
    kind: DefaultAdmissionConfig
Restart control plane services with:
$ master-restart api && master-restart controllers
Validating the Install
To validate that K10 has been installed properly, the following
command can be run in K10's namespace (the install default is
kasten-io) to watch for the status of all K10 pods:
$ kubectl get pods --namespace kasten-io --watch
It may take a couple of minutes for all pods to come up but all pods
should ultimately display the status of Running.
$ kubectl get pods --namespace kasten-io
NAMESPACE     NAME                                    READY   STATUS    RESTARTS   AGE
kasten-io     aggregatedapis-svc-b45d98bb5-w54pr      1/1     Running   0          1m26s
kasten-io     auth-svc-8549fc9c59-9c9fb               1/1     Running   0          1m26s
kasten-io     catalog-svc-f64666fdf-5t5tv             2/2     Running   0          1m26s
...
In the unlikely scenario that pods that are stuck in any other state, please follow the support documentation to debug further.
Validate Dashboard Access
By default, the K10 dashboard will not be exposed externally.
To establish a connection to it, use the following kubectl command
to forward a local port to the K10 ingress port:
$ kubectl --namespace kasten-io port-forward service/gateway 8080:8000
The K10 dashboard will be available at http://127.0.0.1:8080/k10/#/.
For a complete list of options for accessing the Kasten K10 dashboard through a LoadBalancer, Ingress or OpenShift Route you can use the instructions here.