
K10 Disaster Recovery
K10 Disaster Recovery (DR) aims to protect K10 from the underlying infrastructure failures. In particular, this feature provides the ability to recover the K10 platform in case of a variety of disasters such as the accidental deletion of K10, failure of underlying storage that K10 uses for its catalog, or even the accidental destruction of the Kubernetes cluster on which K10 is deployed.
Overview
K10 enables DR with the help of an internal policy to backup its own data stores and store these in an object storage bucket or an NFS file storage location configured using a Location Profile.
External Storage Configuration
To enable K10 DR, a Location Profile needs to be configured. This will use an object storage bucket or an NFS file storage location to store data from K10's internal data stores and the cluster will need to have write permissions to this location.
Enabling K10 Disaster Recovery
K10 DR settings can be accessed from the Settings icon in the
top-right corner of the dashboard or, for a new install, via the
prompt at the bottom of the dashboard.

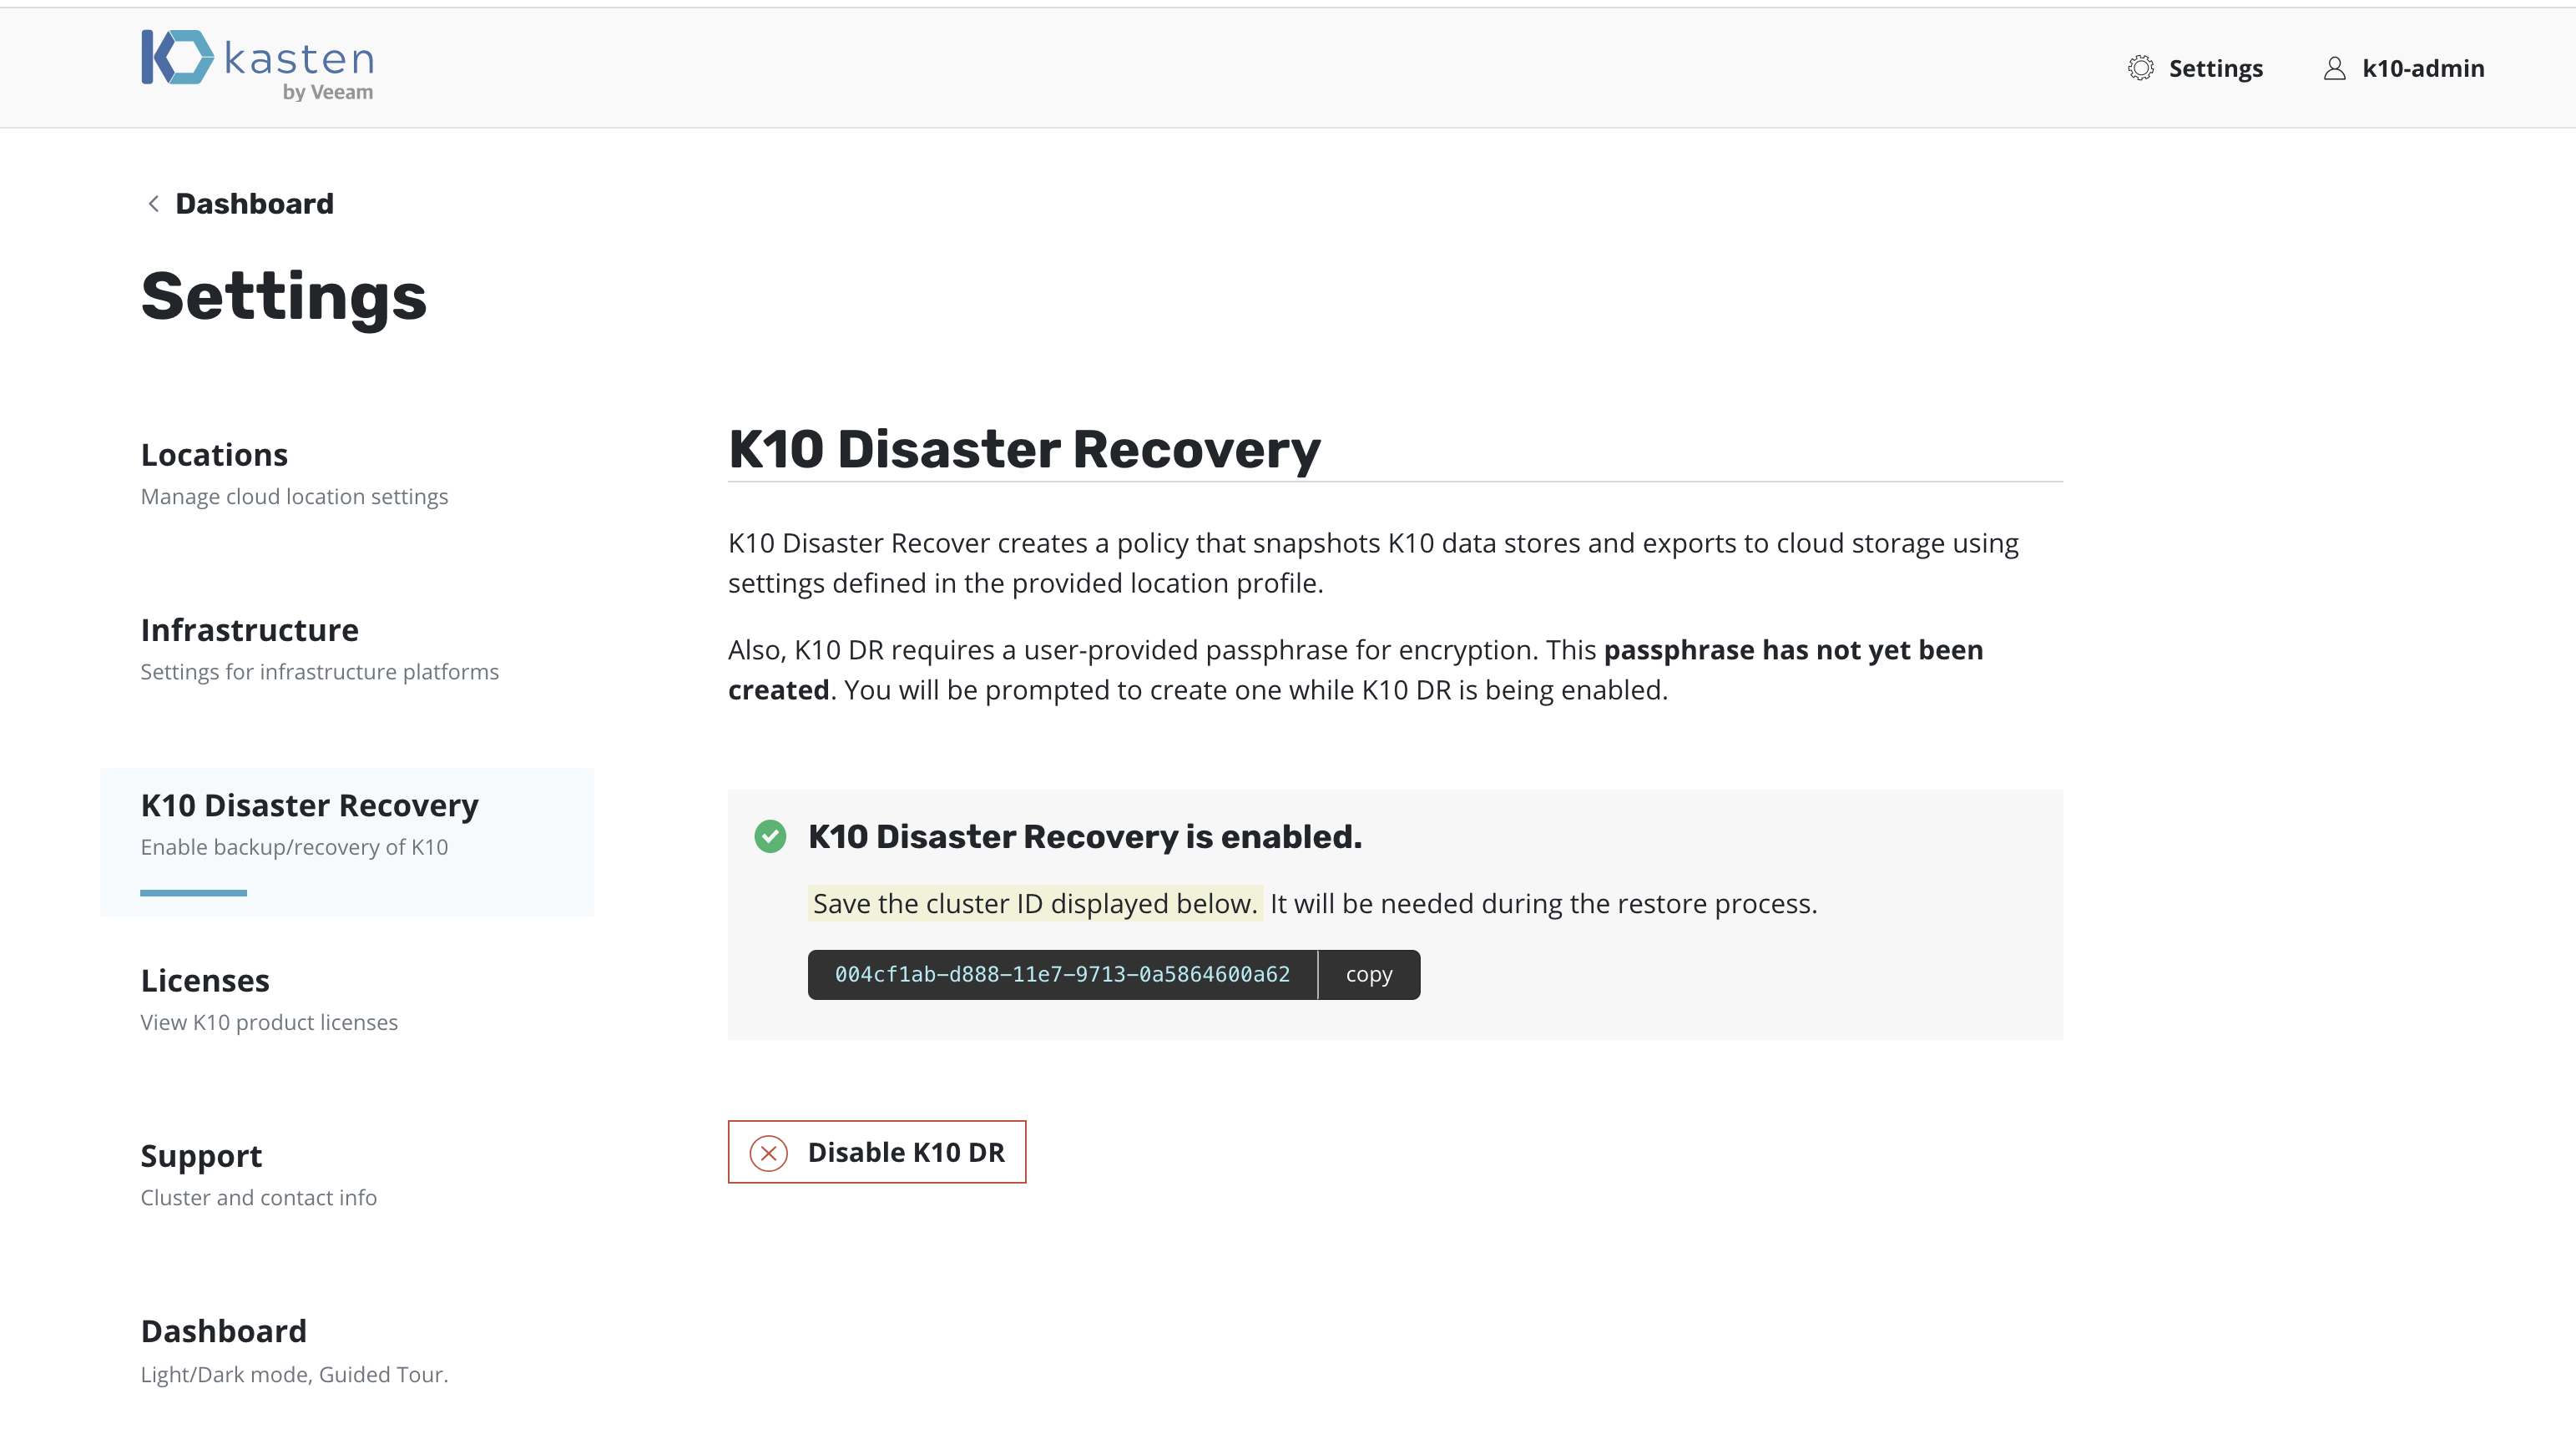
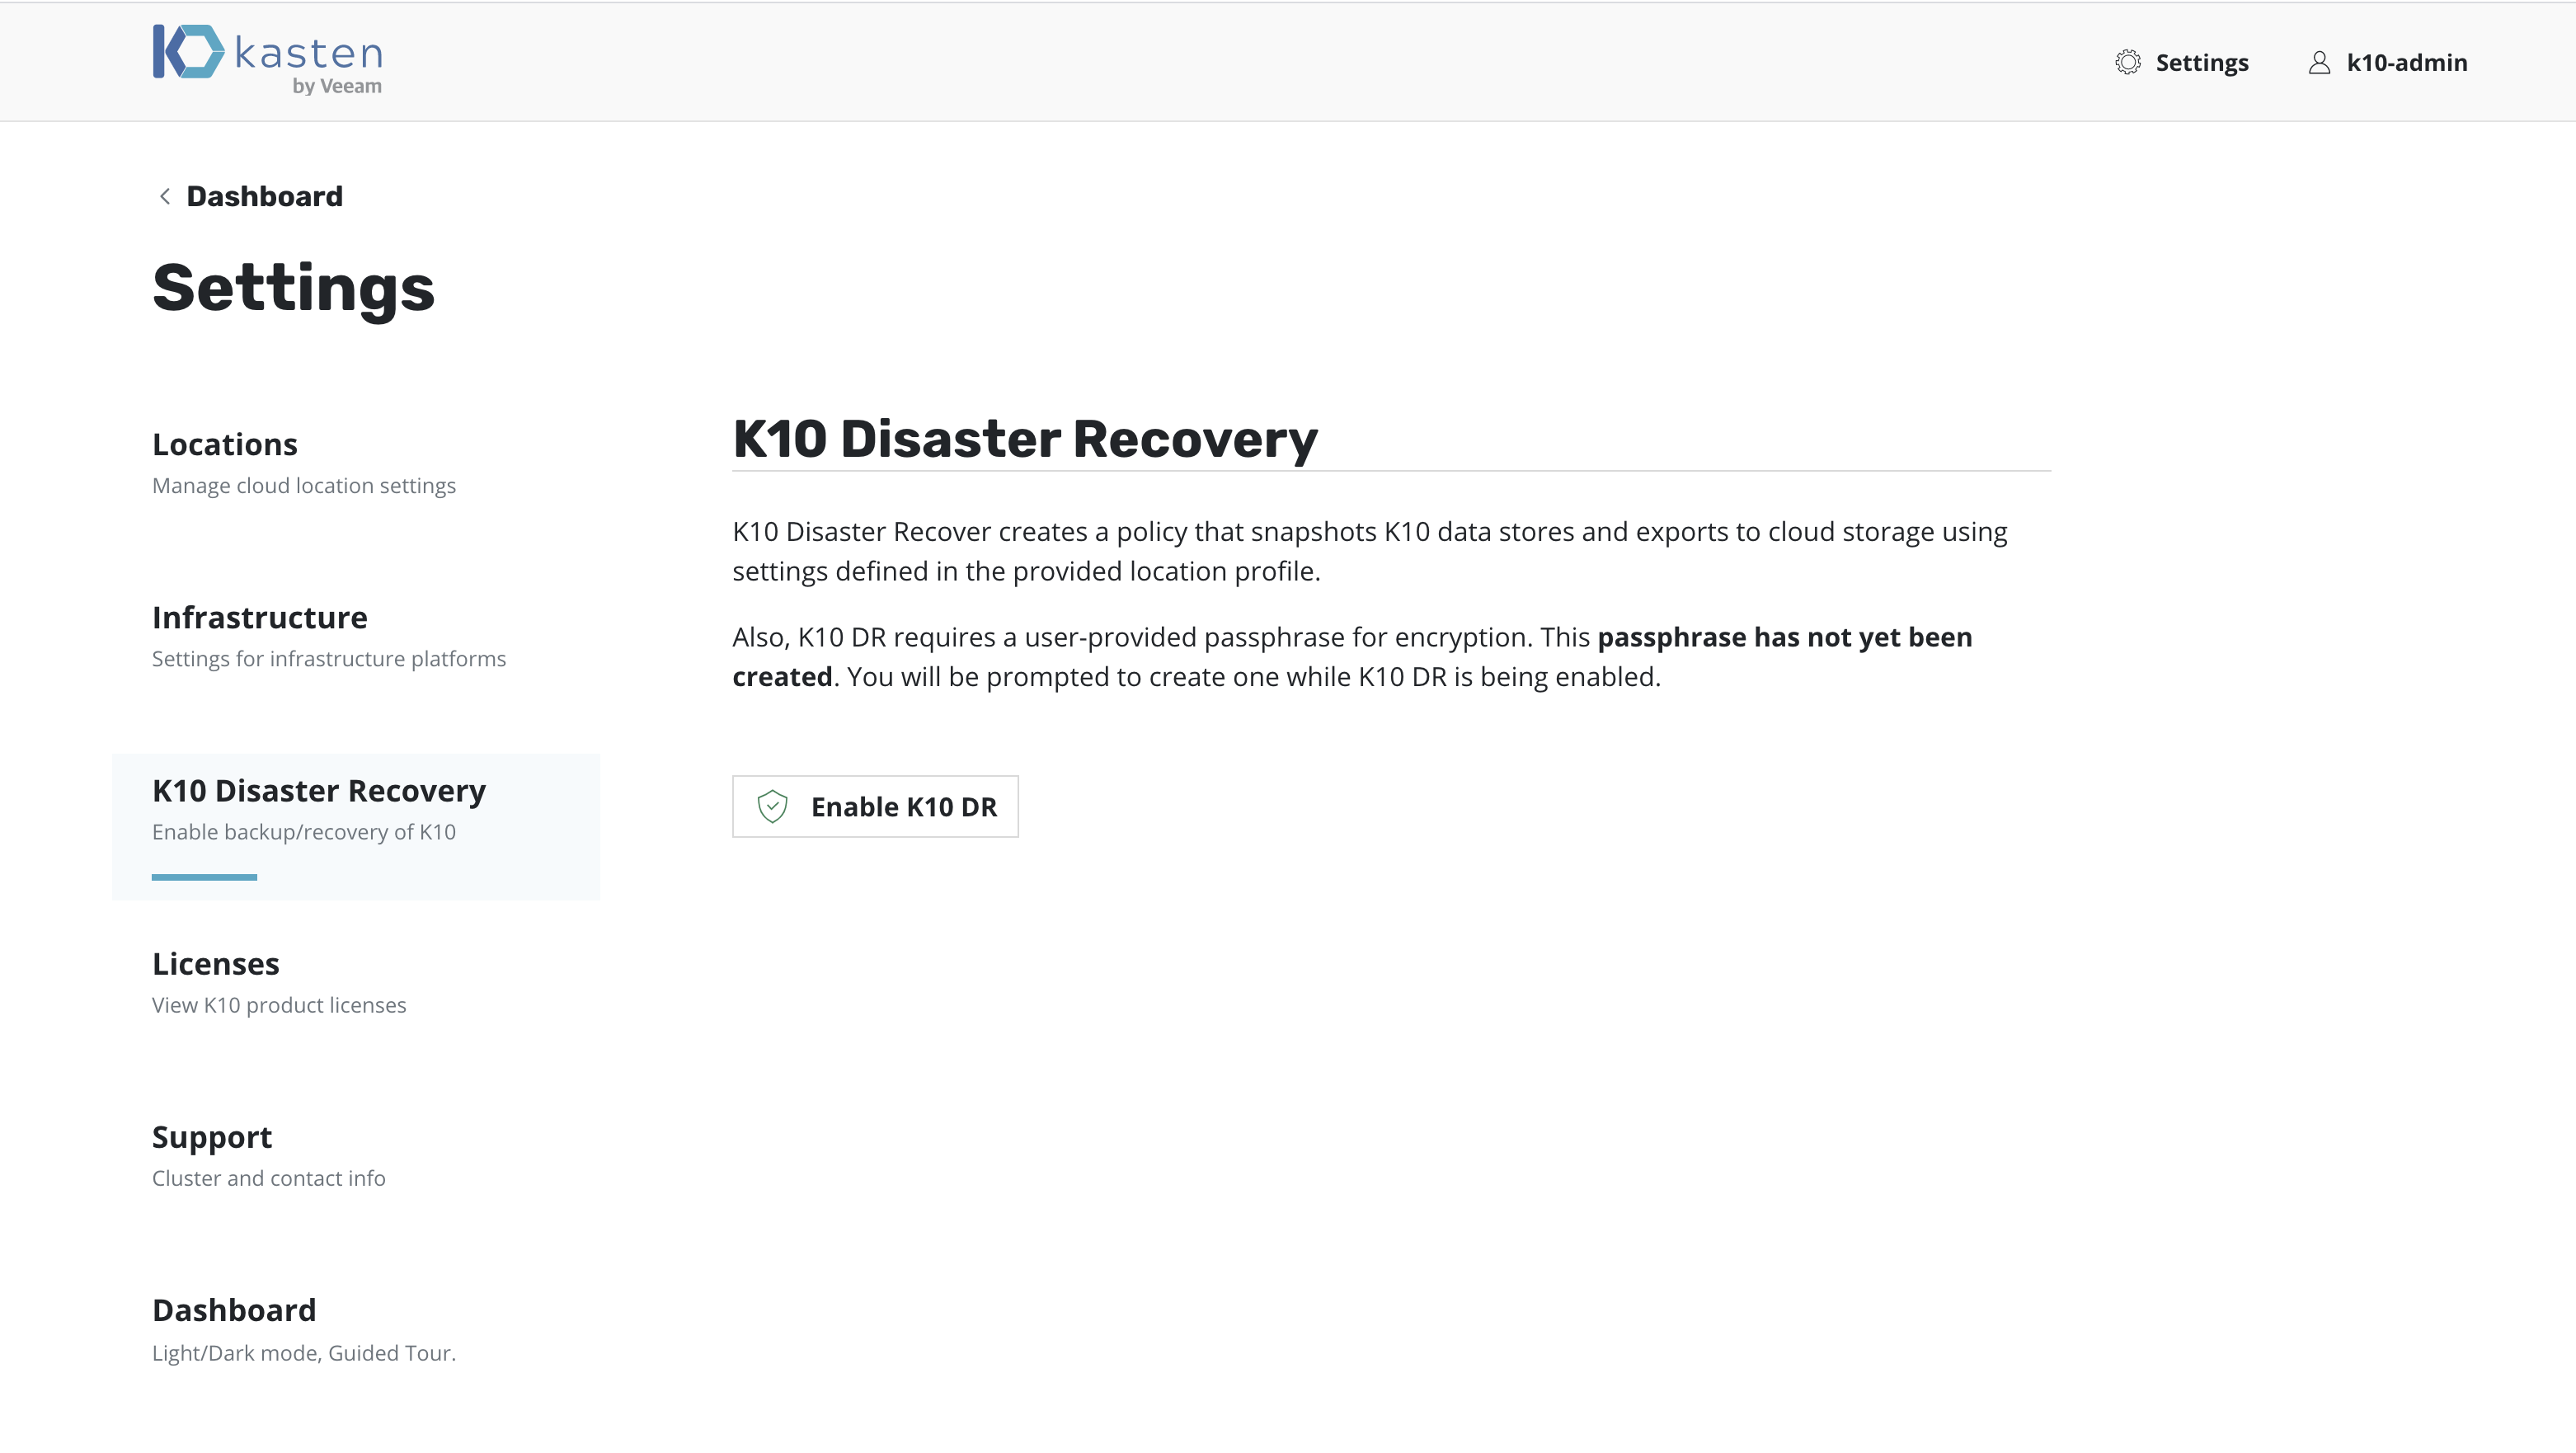
On the Settings page, select K10 Disaster Recovery and then click
the Enabled button to enable disaster recovery.

Return to the Dashboard, select the Policies card, click Run Once
on K10-disaster-recovery-policy

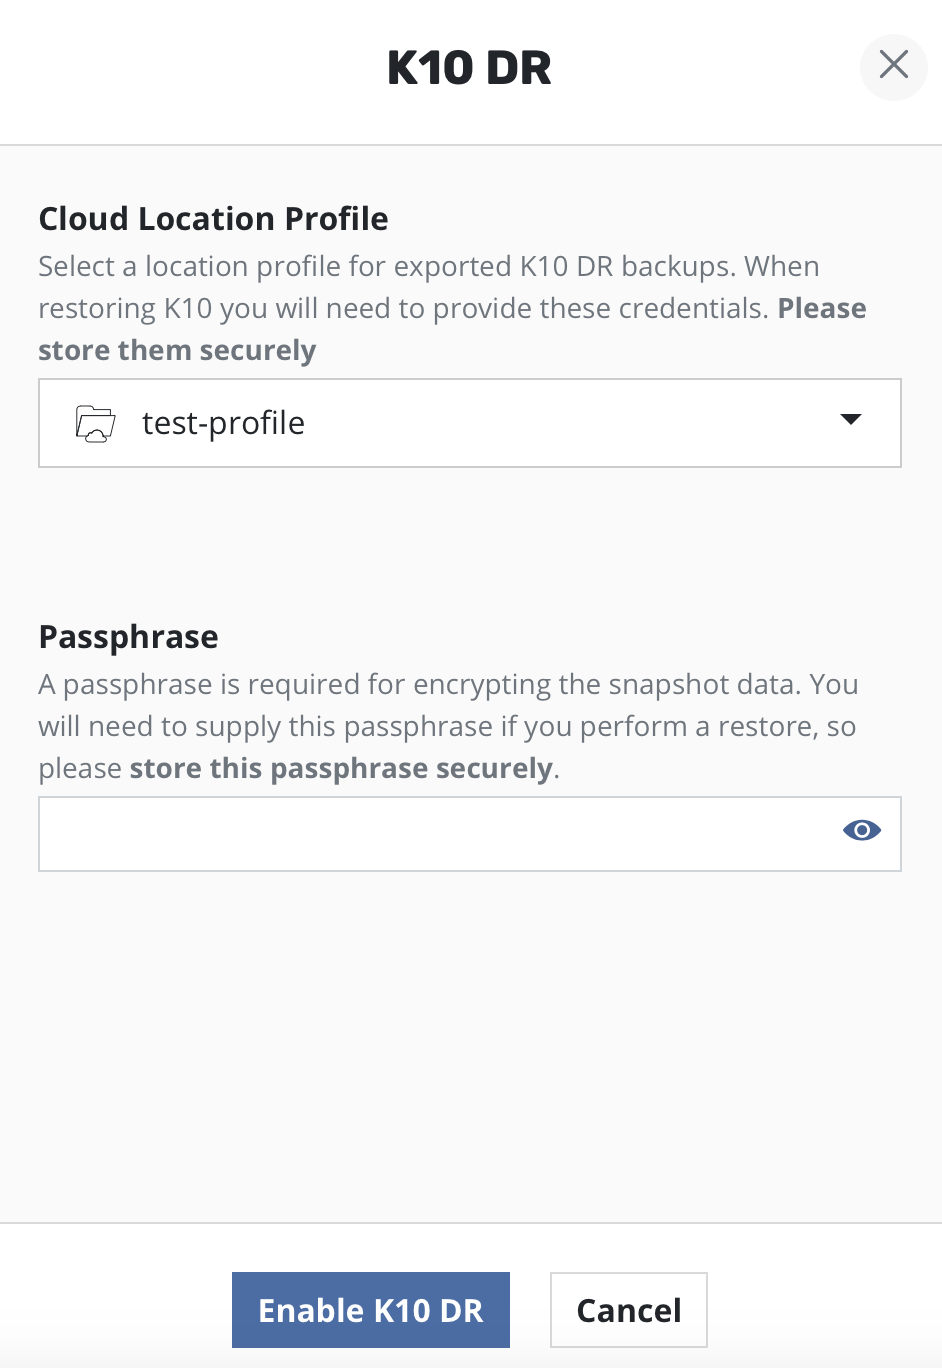
Currently, data exported by K10 for DR is encrypted via AES-256-GCM. If enabling DR for the first time on this cluster, the user will be prompted to enter the passphrase required for encryption. This passphrase needs to be saved securely outside the cluster.
K10 DR can be enabled by clicking the Enable K10 DR button.
A Location Profile and a Passphrase will need to be
provided to enable disaster recovery.
Warning
After enabling K10 DR, it is essential that you copy and save the following to successfully recover K10 from a disaster:
The cluster ID displayed on the disaster recovery page
The DR passphrase entered above
The credentials and object storage bucket or the NFS file storage information (used in the location profile configuration above)
Without this information, K10 Disaster Recovery will not be possible.
Extracting the Cluster ID
The cluster ID can be extracted from the K10 dashboard, as shown
above, or by using the following kubectl command.
# Extract UUID of the `default` namespace
$ kubectl get namespace default -ojsonpath="{.metadata.uid}{'\n'}"
This ID is used as a prefix to the object storage or NFS file storage location where K10's data store snapshots are saved.
The K10 DR Policy
A policy to implement K10 DR will be created and can be viewed from
the Policies page.

Disabling K10 Disaster Recovery
You can disable K10 DR by clicking on the Disabled button on the
K10 Disaster Recovery page under Settings.
Recovering K10 From a Disaster
Recovering from a K10 backup involves the following sequence of actions:
Create a Kubernetes Secret,
k10-dr-secret, using the passphrase provided while enabling DRInstall a fresh K10 instance in the same namespace as the above Secret
Provide bucket information and credentials for the object storage location or NFS file storage location where previous K10 backups are stored
Restoring the K10 backup
Note
If K10 backup is stored using an NFS File Storage Location, it is important that the same NFS share is reachable from the recovery cluster and is mounted on all nodes where K10 is installed.
Specifying a DR Passphrase
Currently, K10 DR encrypts all artifacts via the use of the
AES-256-GCM algorithm. The passphrase entered while enabling DR is
used for this encryption. On the cluster used for K10 recovery, the
Secret k10-dr-secret needs to be therefore created using that same
passphrase. This can be done as follows in the K10 namespace (default
kasten-io) after install:
$ kubectl create secret generic k10-dr-secret \
   --namespace kasten-io \
   --from-literal key=<passphrase>
Reinstall K10
Note
If you are reinstalling K10 on the same cluster, it is important to clean up the namespace in which K10 was previously installed before the above passphrase creation.
# Delete the kasten-io namespace.
$ kubectl delete namespace kasten-io
K10 must be reinstalled before recovery. Please follow the instructions here.
Provide External Storage Configuration
Create a Location Profile with the object storage location or NFS file storage location where K10 backups are stored.
Restore K10 Backup
Requirements:
Source
cluster IDLocation profile name from the previous step
# Install the helm chart that creates the K10 restore job and wait for completion of the `k10-restore` job
# Assumes that K10 is installed in 'kasten-io' namespace.
$ helm install k10-restore kasten/k10restore --namespace=kasten-io \
    --set sourceClusterID=<source-clusterID> \
    --set profile.name=<location-profile-name>
This restore job always restores the restore point catalog and artifact
information. If the restore of other resources (options include profiles,
policies, secrets) needs to be skipped, the skipResource flag can be used.
# e.g. to skip restore of profiles and policies, helm install command will be as follows:
$ helm install k10-restore kasten/k10restore --namespace=kasten-io \
    --set sourceClusterID=<source-clusterID> \
    --set profile.name=<location-profile-name> \
    --set skipResource="profiles\,policies"
Cluster-Scoped Resource Recovery
Prior to recovering applications, it may be desirable to restore cluster-scoped resources. Cluster-scoped resources may be needed for cluster configuration or as part of application recovery.
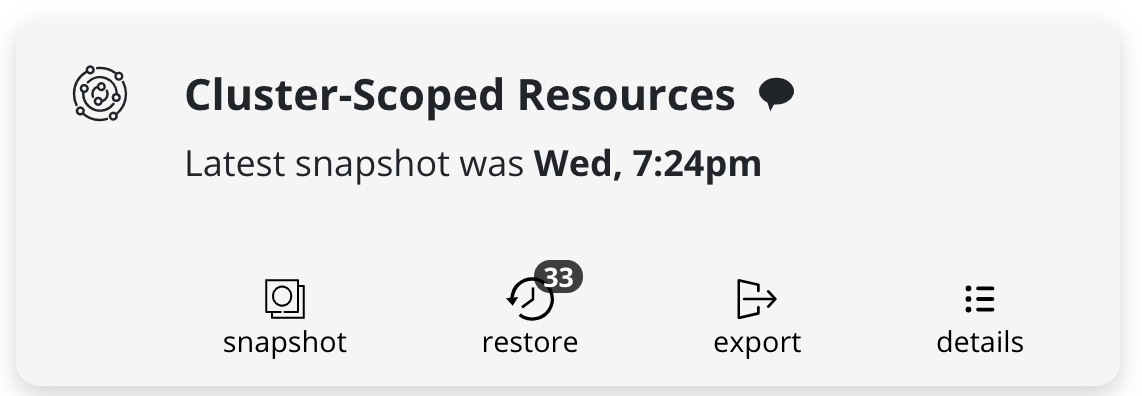
Upon completion of the DR Restore job, go to the Applications card,
hover on the Cluster-Scoped Resources card, click on the
restore icon, and select a cluster restore point
to recover from.
Application Recovery
Upon completion of the DR Restore job, go to the Applications card,
select Removed under the Filter by status drop-down menu.
Click restore under the application and select a restore point
to recover from.
